Domain Enumeration with Bloodhound CE
Categories:
BloodHound allows information about domain accounts and their relationships to be collected automatically and then analyzed and presented in a graph format. It is very powerful to discover hidden and often unintended access rights and privileges possessed by principals. It also give suggestions on how attackers may abuse those access to achieve lateral movement or privilege escalation.
Please consult this quick start guide on how to install and set up the newest version of BloodHound Community Edition.
Collecting Domain Data
After installing BloodHound CE, we may launch it with the bloodhound up command. We can then go to localhost:8080 with a web browser and login with the credentials provided during setup.
We need to collect data on the target domain in order for BloodHound to analyze them. This can be done using collectors from both Windows and Linux.
We need to use collectors specifically made for BloodHound CE, not BloodHound Legacyin order for BloodHound CE to read the data successfully.
SharpHound (Windows)
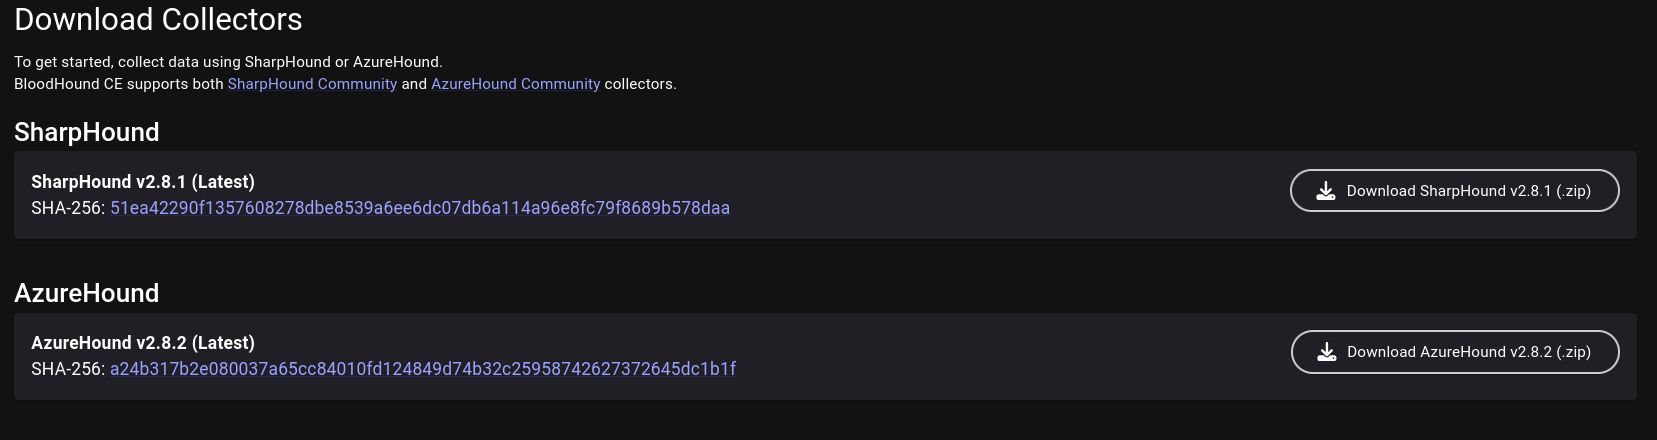
SharpHound helps us to collect domain information from the perspective of a domain Windows computer. We may navigate to the Download Collectors tab from the left-side menu, and download the latest SharpHound release.
SharpHound comes in as both a PowerShell module (.ps1) and a C#-compiled executable (.exe). We may choose to transfer either to the domain computer.
PowerShell Version:
Import-Module .\SharpHound.ps1
Invoke-BloodHound -CollectionMethod All
C# Executable:
.\SharpHound.exe -c All
SharpHound may take a while to collect the data. Once done, the domain data is stored inside a Zip archive. We want to transfer the files to our machine and feed them into BloodHound.
[...]
2026-04-10T11:21:53.4090266-07:00|INFORMATION|SharpHound Enumeration Completed at 11:21 AM on 4/10/2026! Happy Graphing!
PS C:\temp> ls


    Directory: C:\temp


Mode                 LastWriteTime         Length Name
----                 -------------         ------ ----
-a----         4/10/2026  11:21 AM          42836 20260410112007_BloodHound.zip
-a----         4/10/2026  11:21 AM           2038 NDJlZTM5N2ItODYwNy00N2VkLThkMjEtYzI4MGJiMWU2ZGRk.bin
-a----        11/25/2025   5:13 PM        1316352 SharpHound.exe
BloodHound Python (Linux)
If we don’t have the ability to execute code as a domain user or SYSTEM on a domain computer, but we have access to the credentials of a domain user, we may use bloodhound-python to collect data from the perspective of a Linux machine.
bloodhound-ce-python -c all -d <domain_fqdn> -u <username> -p <password> -dc <dc_hostname> -ns <dc_ip>
BloodHound-python stores the collected data inside JSON files without archiving them, but they can still be imported to BloodHound nonetheless.
╭─brian@rx-93-nu /tmp/bloodhound
╰─$ bloodhound-ce-python -c all -d gundam.local -u amuro.ray -p "Password1" -dc ra-cailum.gundam.local -ns 10.10.0.3
INFO: BloodHound.py for BloodHound Community Edition
INFO: Found AD domain: gundam.local
INFO: Getting TGT for user
INFO: Connecting to LDAP server: ra-cailum.gundam.local
WARNING: LDAP Authentication is refused because LDAP signing is enabled. Trying to connect over LDAPS instead...
INFO: Found 1 domains
INFO: Found 1 domains in the forest
INFO: Found 5 computers
INFO: Connecting to LDAP server: ra-cailum.gundam.local
WARNING: LDAP Authentication is refused because LDAP signing is enabled. Trying to connect over LDAPS instead...
INFO: Found 9 users
INFO: Found 57 groups
INFO: Found 2 gpos
INFO: Found 2 ous
INFO: Found 19 containers
INFO: Found 0 trusts
INFO: Starting computer enumeration with 10 workers
INFO: Querying computer: msz-006-zeta.gundam.local
INFO: Querying computer: SINANJU.GUNDAM.local
INFO: Querying computer: MSN-04-SAZABI.GUNDAM.local
INFO: Querying computer: RX-0-UNICORN.GUNDAM.local
INFO: Querying computer: RA-CAILUM.GUNDAM.local
INFO: Done in 00M 02S
╭─brian@rx-93-nu /tmp/bloodhound
╰─$ ls
20260410132613_computers.json   20260410132613_domains.json  20260410132613_groups.json  20260410132613_users.json
20260410132613_containers.json  20260410132613_gpos.json     20260410132613_ous.json
Importing Data
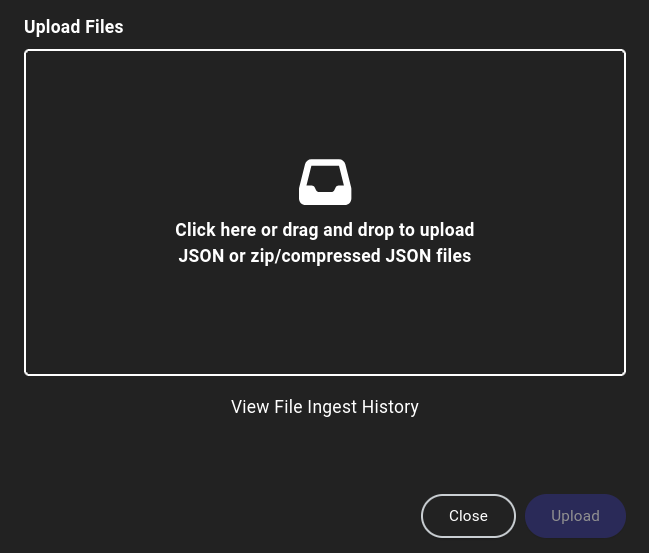
Back on BloodHound, we click on the Quick Upload tab on the left-side menu, which presents this upload pop-up. We click on the upload box and choose the domain data files we gathered using collectors.
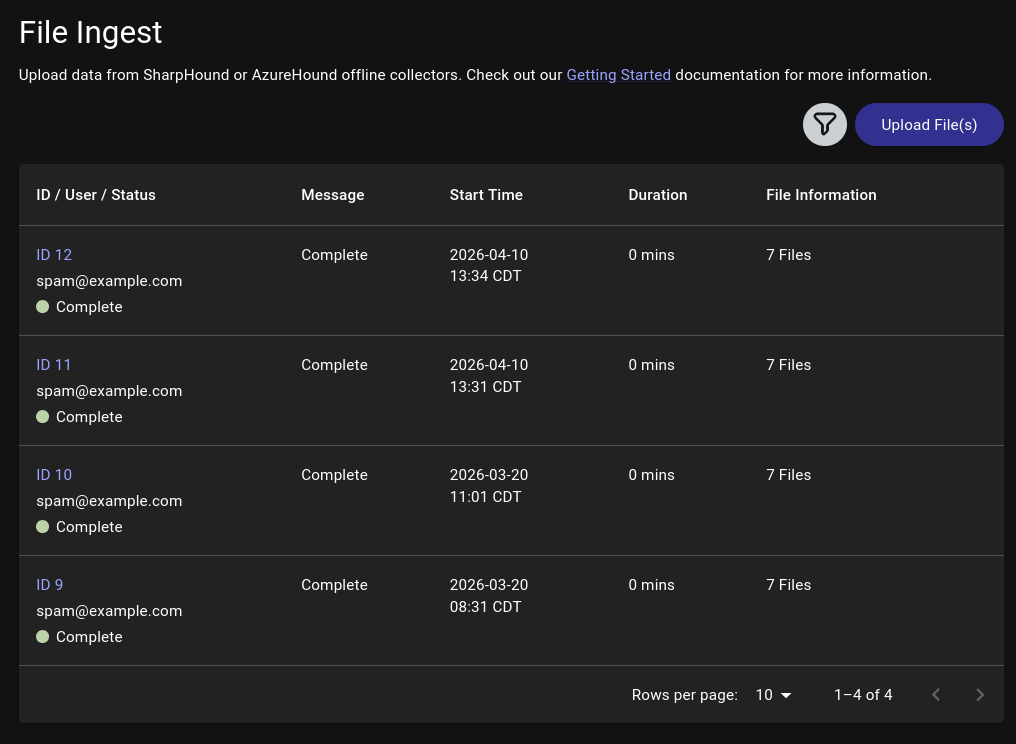
We may close out the pop-up once all files have been successfully uploaded, or check on the progress of data processing by clicking on View File Ingest History, which may take a while depending on the size of the target domain.
Domain Analysis
The first step we should do is to search for users and other objects we control, then right click on them and select Add to Owned. A small skull symbol will appear at the bottom right corner of the object.

Next, we left-click on the user and the Object Information table will pop up on the right, allowing us to view user attributes as well relationships such as:
- Sessions on domain machines
- Group Memberships
- Local Admin Privileges
- Execution Privileges (RDP, WinRM, MSSQL)
- OutBound Object Control (What this user object controls)
- InBound Object Control (What objects control this user)
All such information reveal possible lateral movement paths we may take inside the domain to expand our access.
Edge Analysis
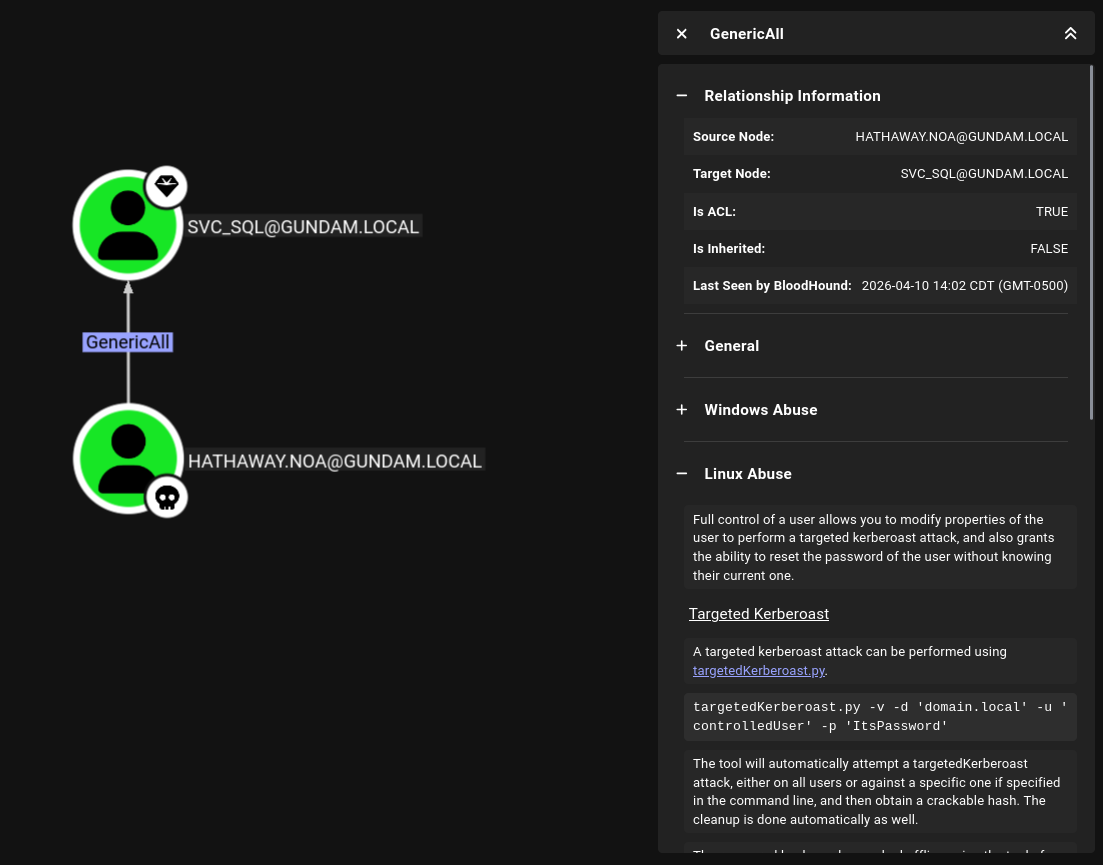
BloodHound represents the domain as a graph. Objects (users, computers, groups, domains, etc.) are nodes and relationships (group memberships, privileges, access rights, and etc.) are edges connecting the nodes. For example, the hathaway.noa user inside gundam.local demo domain is found with GenericAll access rights over the svc_sql service account.
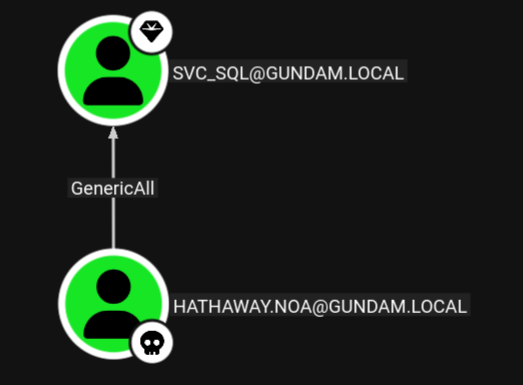
we can click on the edge, and BloodHound presents us with information about the GenericAll access rights, as well as methods on how to abuse it from Windows or Linux.
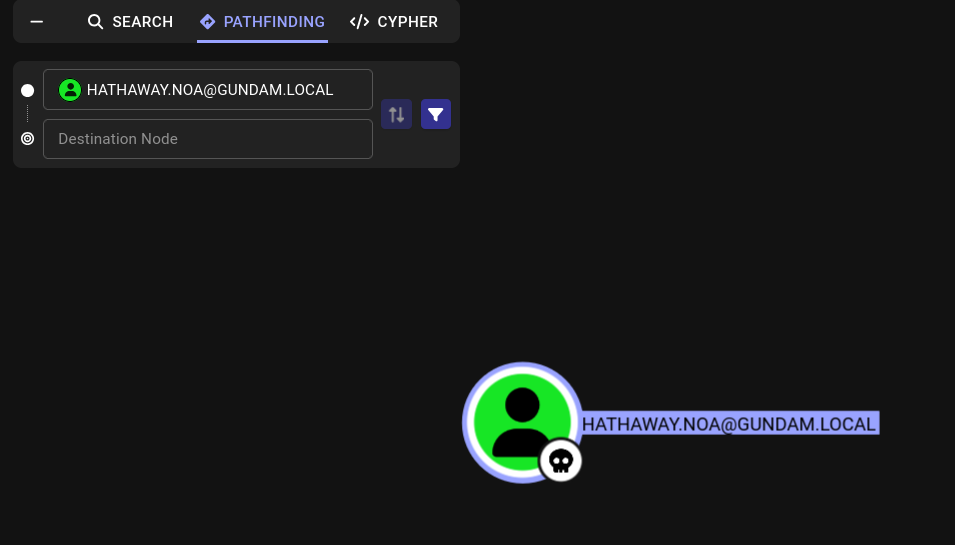
We can also utilize BloodHound to discover multi-step attack path. We want to right-click on our owned user and select set as starting node. The Pathfinding tab will open up on the left, allowing us to enter our destination node.
Here, we enter and select ra-cailum.gundam.local, the domain controller of the gundam.local domain. BloodHound presents us with a clear path to the domain controller.
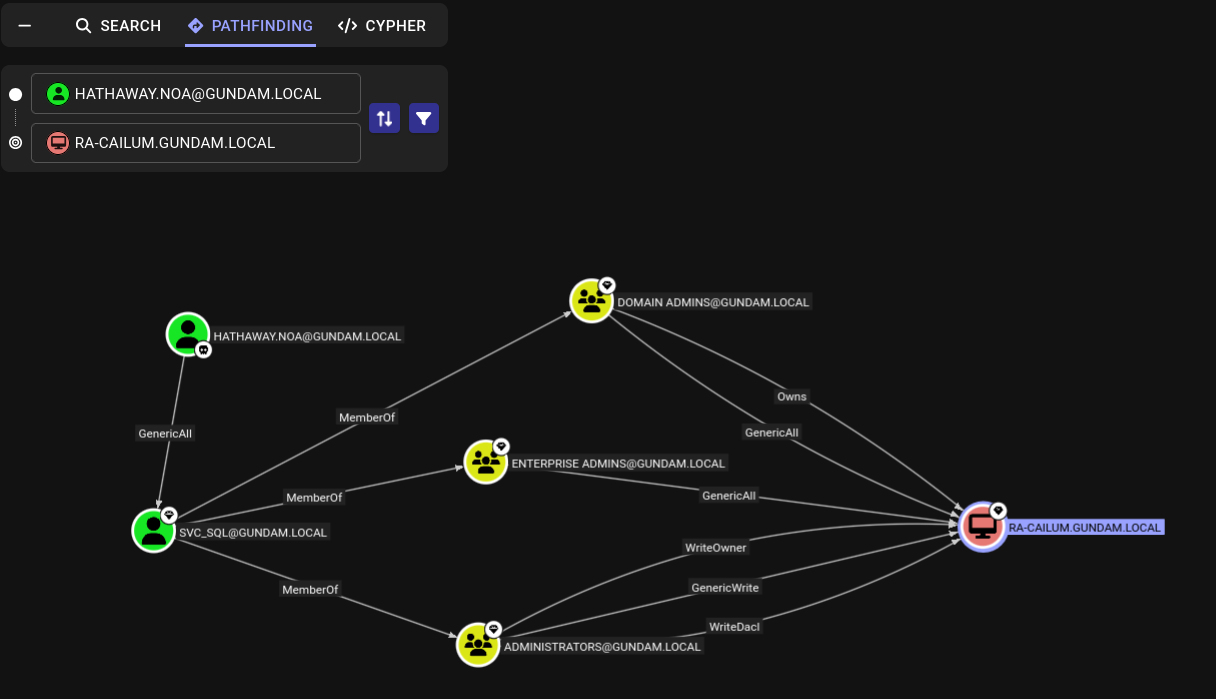
As svc_sql is a member of the Domain Admins group, it has ownership and full control over the DC. This means, if we compromise the svc_sql through the GenericAll access rights hathaway.noa possesses over the service account, we can leverage our control over svc_sql to fully compromise the domain.
Cypher
Cypher is a query language for graph databases that BloodHound supports. It allows us to discover objects that matches certain criteria (e.g. all Kerberoastable Users), or relationships between objects that matches our criteria (e.g. find all users with PSRemote access and the machines they have access to).
Saved Queries
On the CYHPHER tab on the left side, we can clicking on Saved Queries to find queries that comes with each BloodHonud install.
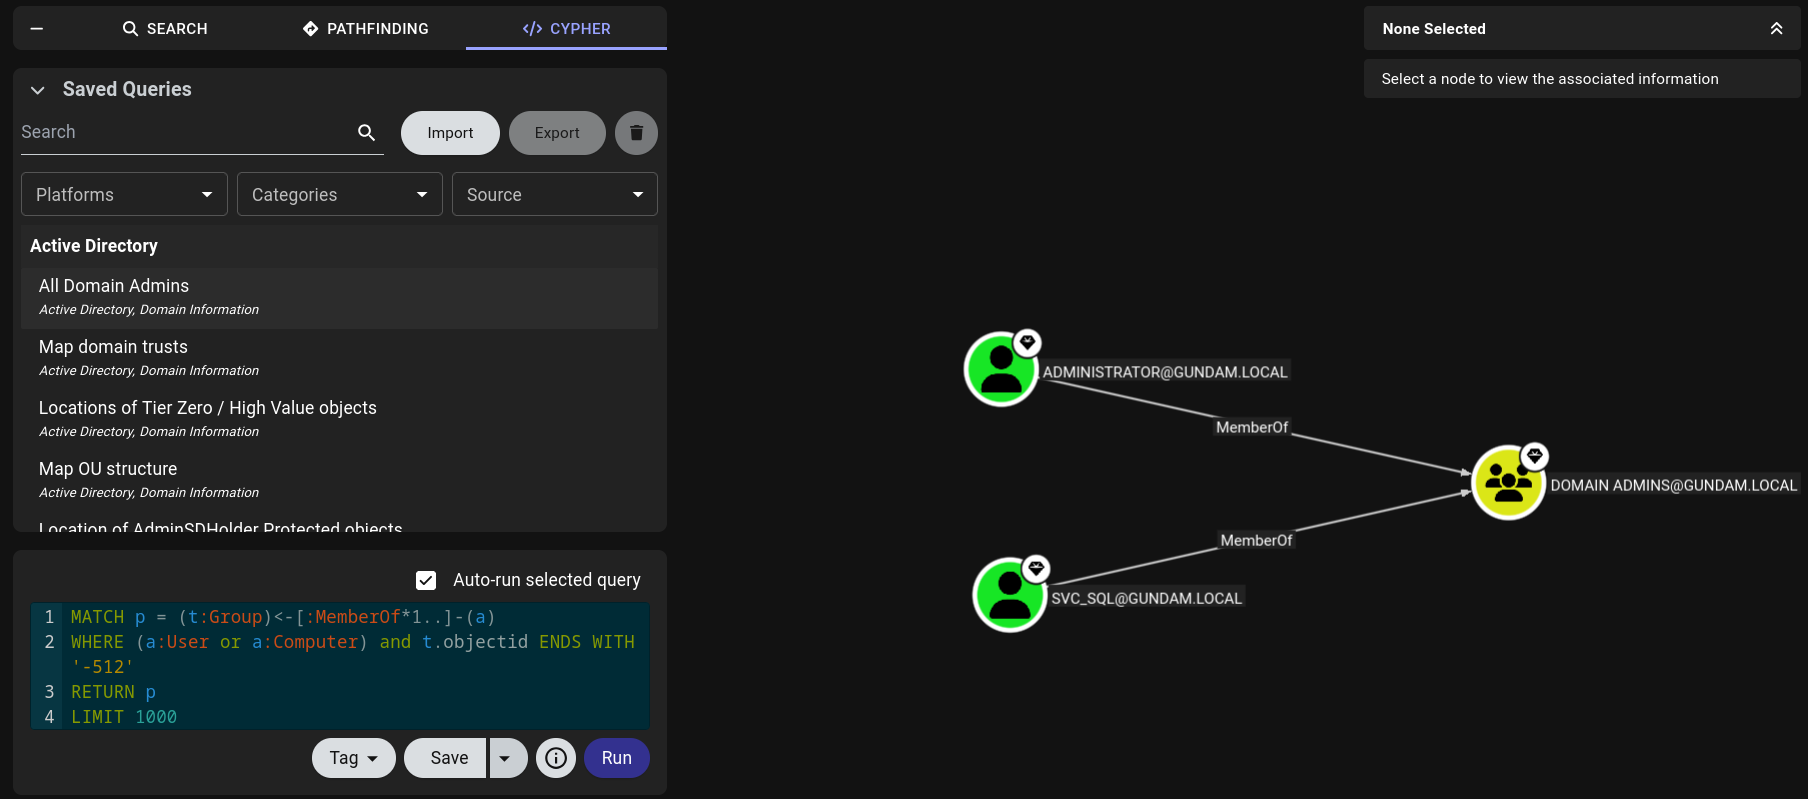
There are many saved queries that may be particularly helpful. We can search for particular queries like All Kerberoastable Users or filter by Platform, Categories, or Source.
Custom Queries
We may also write custom Cypher queries. To run a custom query, we may write it directly into the query box below Saved Query or paste into it.
Below are a couple of custom queries that can be helpful:
Find users with WinRM privileges and the machines they have access to.
MATCH p1=shortestPath((u1:User)-[r1:MemberOf*1..]->(g1:Group)) MATCH p2=(u1)-[:CanPSRemote*1..]->(c:Computer) RETURN p2
Find users with SQL server admin privileges and the machines they have access to.
MATCH p1=shortestPath((u1:User)-[r1:MemberOf*1..]->(g1:Group)) MATCH p2=(u1)-[:SQLAdmin*1..]->(c:Computer) RETURN p2
Reference and Further Reading
Feedback
Was this page helpful?
Glad to hear it! Please tell us how we can improve.
Sorry to hear that. Please tell us how we can improve.